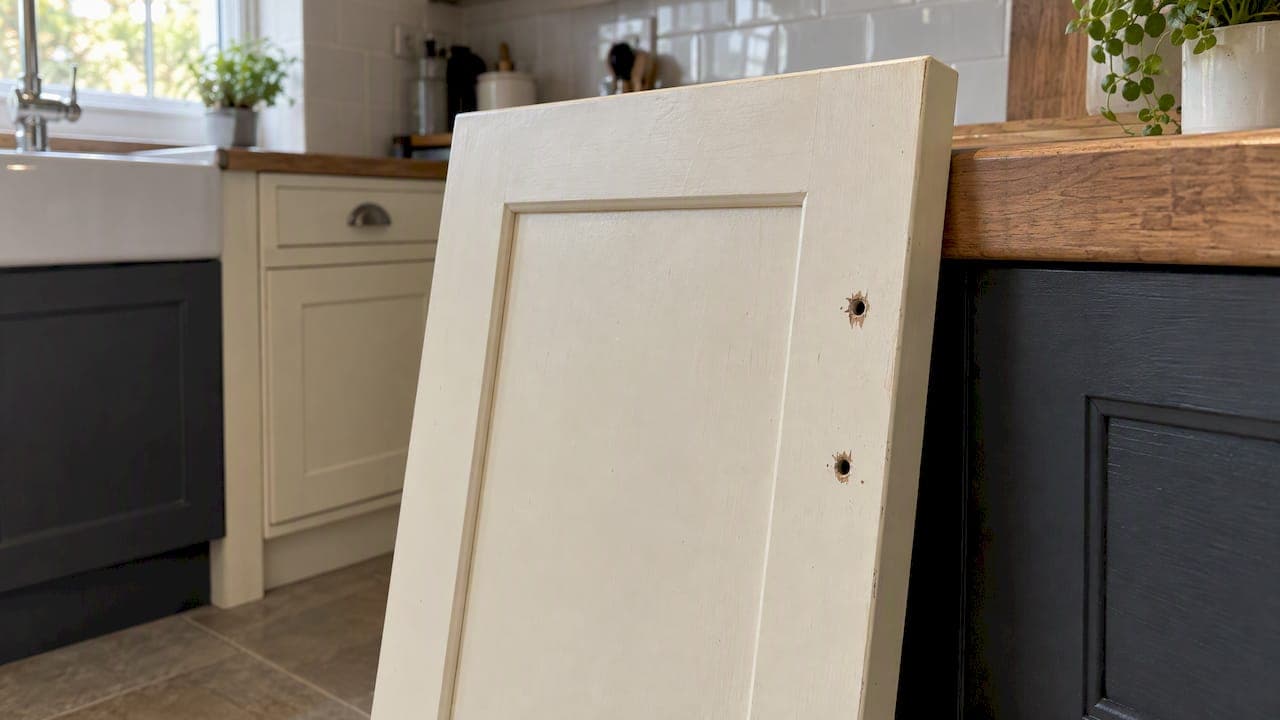
For most painted cabinet doors, a two-part epoxy filler is the quickest reliable way to fill handle holes. Choose a glued wood dowel when a hole is deep, stripped or close to a hinge. If your new handles have a base wide enough to cover the old footprint, a backplate hides the holes without any filling or repainting.
TL;DR:
- Use a glued dowel for holes deeper than 3/4 inch, stripped cores, or holes near hinges because it restores solid wood for screws to grip.
- For stained wood, choose solvent based filler or a matching species dowel; on veneer, sand lightly to avoid cutting through the thin surface.
- Measure beyond the holes’ outer edges and confirm a backplate overlaps each side by a few millimeters; matching 96mm or 128mm centers can reuse existing holes.
- After the filler or glue fully cures, sand from 220 to 320 grit, spot prime, and paint the entire door to blend sheen and color.
Table of Contents
- Which method should you use for your holes?
- How do you fill handle holes with two-part epoxy or wood filler?
- When is the dowel and glue method the better repair?
- Can you hide the holes without filling them?
- How do you sand, prime and finish so the patch disappears?
- How do you redrill and fit the new handles?
- What materials and tools do you need?
- When is DIY enough, and when does a professional make sense?
- Can we remove the holes altogether with a professional finish?
- FAQ
- Sources
Which method should you use for your holes?
Pick the method by hole size, door material and finish, not by habit. Here is how the three routes compare:
- Two-part epoxy filler: best for painted doors and shallow or slightly worn holes. Epoxy cures hard in under 30 minutes and resists shrinking.
- Dowel and glue: the durable choice for holes deeper than 3/4 inch, stripped cores or holes near hinges, because it puts solid wood back where the screw bites.
- Backplate or larger-base hardware: the fastest route when the new handle covers the old holes completely. No filling, sanding or painting.
Match the method to the door as well. Painted MDF and lacquered doors take epoxy well. Solid wood with a stained finish suits a solvent-based filler or a stained dowel plug. Veneered panels need a gentle touch: fill, sand lightly and avoid sanding through the veneer.
If the holes are only a few millimetres wider than the new hardware's footprint, skip the filler and choose a bigger backplate instead.
How do you fill handle holes with two-part epoxy or wood filler?
This is the repair most DIYers will need. Work in a well-lit room and keep your first patch somewhere forgiving, such as the back of a door.
- Prep the hole. Clean out dust and loose paint, wipe the area with a degreaser, and lightly abrade any glossy edges so the filler grips. Pick out loose wood threads with a pin.
- Mix the filler. Blend the two parts to a uniform colour, following the pack instructions. Only mix what you can use in a few minutes.
- Pack and overfill. Press the filler in with a putty knife, working it in from both sides if the hole goes through. Leave it slightly proud of the surface, because it is much easier to sand down than to top up.
- Let it cure. High-performance fillers cure in around 30 minutes and can then be sanded, stained, varnished or painted. Always follow the cure time on your own product.
- Sand flush. Start with 220 grit, then finish with 320 until your fingertip cannot feel the edge of the patch.
- Spot-prime. Use a stain-blocking primer on the repair, then blend your topcoat across the whole door so the sheen matches.
Pro Tip: Test a cured patch on scrap or the back of a door first. Fillers absorb paint and stain differently from natural wood, and a quick test shows you whether the patch will stand out.
Ordinary multi-purpose fillers are limited to about 5mm per layer, so a deep hole needs a high-performance product or the dowel method below.

When is the dowel and glue method the better repair?
Use a dowel when filler alone will not hold a screw. That means holes deeper than about 3/4 inch, enlarged or stripped holes, or holes near hinges where the door takes constant stress. Cabinet makers prefer dowels for stripped holes because they restore solid wood for the screw to grip, which lasts longer than filler alone.
Choose a dowel just slightly narrower than the hole, or drill the hole out cleanly to a standard dowel size. Use PVA wood glue for bare wood. For a stained finish, pick a dowel of similar species so the grain reads naturally.
- Clean the hole. Remove paint, dust and any old filler so glue meets bare wood.
- Cut the dowel. Make it a little longer than the door is thick, so it can be trimmed back later.
- Glue and insert. Coat the dowel and the hole walls with glue, tap the dowel in until it is snug, and wipe away squeeze-out straight away.
- Cure. Leave it to cure according to the glue manufacturer’s instructions before sanding or drilling.
- Trim flush. Saw or chisel close to the surface, then sand with 220 and 320 grit until level.
- Finish. Spot-prime, then paint or stain, blending across the whole door for an even sheen.
Skim a thin coat of filler over the dowel ends if the grain pattern shows through paint.
Can you hide the holes without filling them?
Sometimes the sensible answer is to cover rather than repair. A backplate sits behind a knob or pull and hides old marks, as long as its edges fully cover the old holes. Backplates and cover plates come in a range of finishes and sizes to suit most modern hardware.
Check coverage before you buy:
- Measure the outer edge of the old holes, not just their centres, and confirm the plate overlaps them by a few millimetres on every side.
- Check the drill centres. Common pull spacings include 96mm and 128mm, so a pull that matches your existing spacing drops straight onto the old holes.
- Think about swapping knobs for pulls (or the reverse): a wider base on the new hardware can cover the old footprint on its own.
- Backplates suit renters and anyone avoiding repainting, as they need no filler, sanding or paint.
Test the look by holding the plate or hardware in place with masking tape before you commit to drilling.
How do you sand, prime and finish so the patch disappears?
Finishing decides whether the repair vanishes or telegraphs through the paint.
- Grit progression: work from 220 to 320 grit, using light pressure and a sanding block so you do not dish the surface.
- Find high and low spots: hold a work light low and almost parallel to the door. Shadows reveal dips, and your fingertips find ridges.
- Stained finishes: choose a solvent-based filler or a dowel, since these suit stained wood better than epoxy.
- Prime the repair: a stain-blocking primer stops the patch absorbing topcoat differently from the rest of the door.
- Blend the topcoat: paint across the whole door, not just the patch, so sheen and colour stay consistent.
- Protect bare wood: a quick-dry interior varnish such as Ronseal Trade Quick Dry Interior Varnish, which can be recoated after one hour, suits interior woodwork.
Pro Tip: Choose the topcoat sheen before you start. If you are changing colour as well, this guide to interior door colours from One Day Doors & Closets can help you decide.
If your doors are oak, our guide to grain filling oak cabinets shows how to get a flat finish over open grain.
How do you redrill and fit the new handles?
Redrilling is where good repairs get spoiled, so slow down.
- Use a jig. A hardware jig gives repeatable spacing, which tape and a pencil cannot match across a whole kitchen. Manufacturer installation guidance recommends templates or jigs for exactly this reason.
- Mark and punch. Mark the centres and make a small dent with a centre punch so the bit does not wander.
- Back the door. Clamp a sacrificial block of scrap wood tightly against the back, then drill from the front through to the back. This prevents tear-out on the reverse face.
- Choose the right bit. Use a bit size suited to your hardware. Check its instructions. Check your hardware's instructions.
- Match the screw length. Select screws for your door thickness, so the thread does not poke through the front.
- Wait before drilling. Wait for each product or glue to cure according to its manufacturer’s instructions before drilling. Then fit the handle and test for wobble before moving on.
What materials and tools do you need?
Gather everything before you start, so the filler does not set while you hunt for a knife.
- Two-part epoxy filler for painted doors, or solvent-based wood filler for stained ones
- Hardwood dowels in a size to suit your holes, plus PVA wood glue
- Putty knife, sanding block, 220 and 320 grit paper, and a tack cloth
- Stain-blocking primer, plus paint or stain to match your doors
- Hardware jig, drill, bits and sacrificial scrap block
- Masking tape, a degreaser and a work light
Buy small tubs first and test them on scrap before committing to a large quantity.
When is DIY enough, and when does a professional make sense?
For a handful of holes, DIY repair is economical and well within reach. The picture changes when a whole kitchen needs matching. Dozens of patches mean dozens of chances for a sheen or colour mismatch, and even careful DIY work can show under side lighting. A professional respray or handleless conversion treats every door the same way and delivers one consistent finish. Weigh your time, how uniform you need the result to be and how long it must last against what you would spend yourself.
— Mitchell
Can we remove the holes altogether with a professional finish?
If you would rather not patch door after door, we can do it for you. Our team hand-sprays kitchen cupboards to a factory standard. We also handle handleless conversions, giving the whole kitchen a fresh look.

Every job comes with a transferable warranty, and you pay only on completion. If the repairs add up to a bigger job, see what kitchen respraying costs and request a quote. For a sense of how a spray finish compares with DIY, our guide to kitchen cabinet spraying costs and process covers it in detail.
FAQ
What is the best cabinet hole filler?
For painted cabinets, a two-part epoxy filler is the best all-round choice because it cures hard quickly and resists shrinking. A high-performance wood filler that fills holes of any depth is a good alternative. Stained wood is better served by a solvent-based filler or a dowel.
How do you cover drilled holes in a cabinet?
You can fill them or hide them. Filling means packing epoxy or wood filler, sanding flush, priming and repainting. Hiding means fitting a backplate or hardware with a base wide enough to cover the old holes completely.
What is the best filler for screw holes?
For shallow screw holes in painted doors, epoxy or a high-performance wood filler works well. For holes that are stripped or deep, a glued dowel gives the screw solid wood to grip. Always follow the cure time on your product before sanding or redrilling.
What is the usual placement guide for cabinet handles?
A common approach is to position handles at a comfortable reach from the edge of the door. Treat this as a starting point and adjust to your door size and style. Use a jig so every door matches.
Sources
- High Performance Wood Filler | Interior & Exterior Repairs
- Knobs
- Installing New Cabinet Hardware
- Amerock
- RONSEAL TRADE QUICK DRY INTERIOR VARNISH