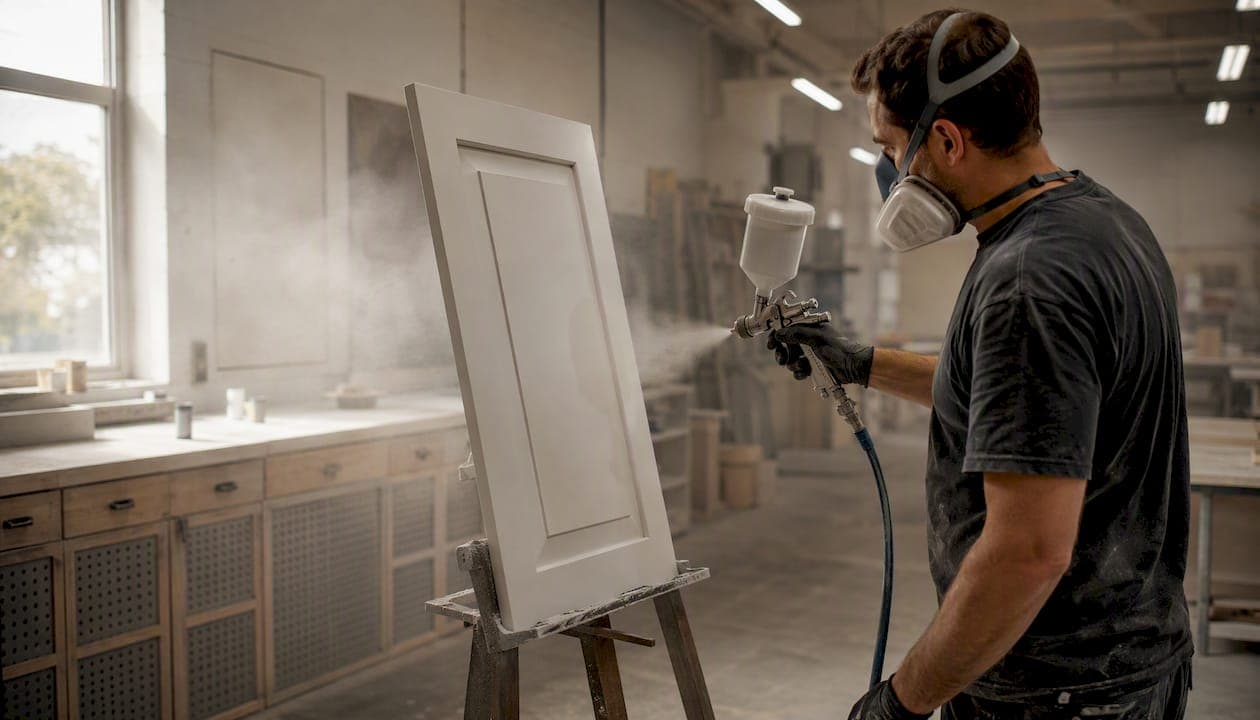
Kitchen cabinet spraying is one of the most cost-effective ways to refresh a tired kitchen without the disruption of a full replacement. For most UK homeowners, a professional respray generally costs several thousand pounds depending on kitchen size, substrate, and finish, while a full replacement typically runs into five figures. The verdict: if your carcasses are structurally sound and your doors are in reasonable condition, spraying is almost always worth considering first.
Here is what to expect at a glance:
- Small kitchen (10–15 doors/drawers): roughly £800–£1,500 for a professional finish
- Medium kitchen (16–25 doors/drawers): roughly £1,500–£2,800
- Full kitchen with island: £2,500–£4,000+, depending on complexity and finish
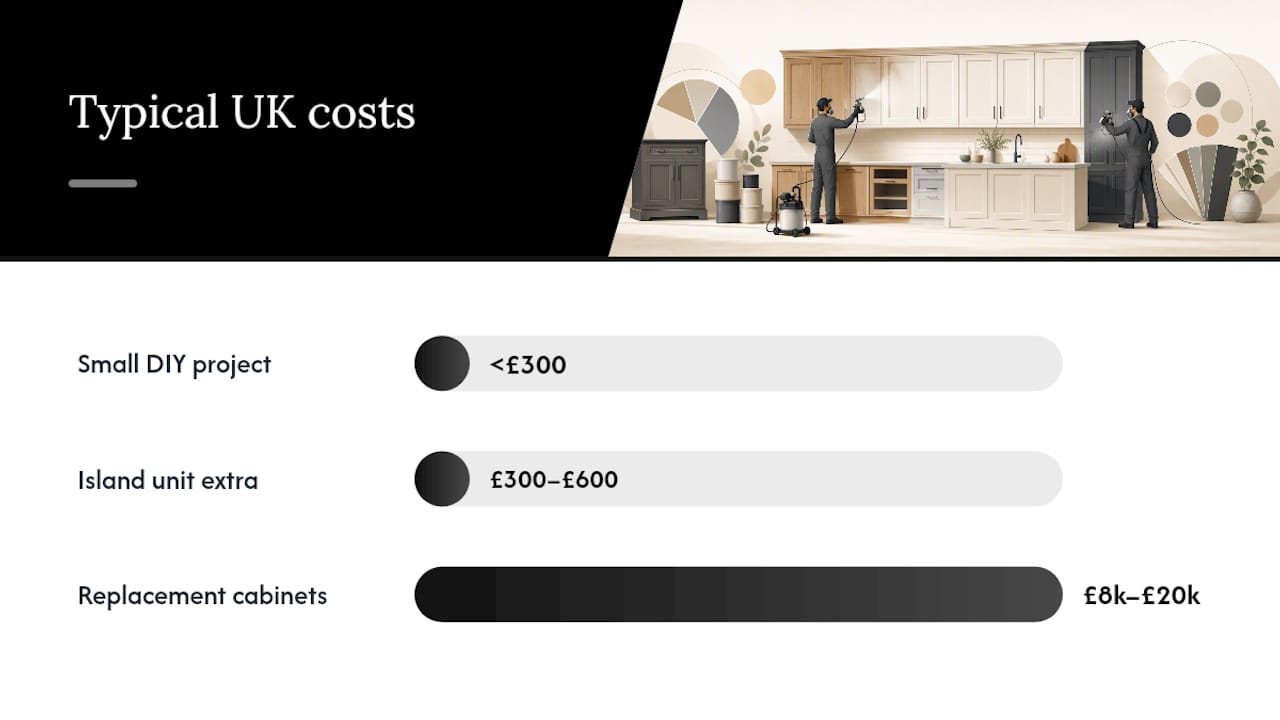
- DIY small project (a few doors): potentially under £300 with the right equipment, though matching a professional result demands proper prep and technique
The key trade-off is straightforward: professional spraying takes two to five days on site (or a similar period in a workshop), causes minimal structural disruption, and delivers a finish that lasts years when done correctly. The single biggest determinant of longevity is not the colour or even the topcoat brand — it is preparation. Skimping on degreasing, sanding, or priming is what causes a respray to peel within months.
Next step: request a written, itemised quote from a local contractor, ask specifically about their primer and prep process, and inspect your door surfaces for delamination or damage before committing.
Key takeaways
Professional kitchen cabinet spraying costs between £800 and £4,000 for most UK kitchens, delivers a factory-standard finish without structural disruption, and lasts years when preparation, primer, and topcoat are chosen correctly for the substrate.
| Point | Details |
|---|---|
| Cost range | Small kitchens from £800–£1,500; large kitchens with islands up to £4,000+. |
| Preparation is decisive | Degreasing, sanding, and bonding primer determine longevity on laminate, melamine, and MDF. |
| Hire checklist | Ask for written quote, insurance, warranty in writing, substrate experience, and no-subcontractor confirmation. |
| DIY limits | DIY suits single doors or small cabinets; full kitchens and laminate surfaces need professional equipment and technique. |
| Refinishingstudio | Offers hand-spray kitchen respraying across South Wales with a five-year transferable warranty and 1,000+ completed projects. |
Table of Contents
- How much does kitchen cabinet spraying cost in the UK?
- What do standard, premium, and factory-finish tiers actually include?
- What happens during a professional spray job, step by step?
- Which primers and topcoats work best on kitchen cabinets?
- Should you attempt a DIY respray or hire a professional?
- How to choose a kitchen cabinet spraying contractor
- Why preparation decides whether a respray lasts
- Refinishingstudio's approach to kitchen respraying in South Wales
- Get a quote from Refinishingstudio
- Sources
How much does kitchen cabinet spraying cost in the UK?
Price is driven by a handful of variables, and understanding them helps you read a quote critically rather than just comparing the bottom line.
Primary cost drivers:
- Number of doors and drawer fronts: the single biggest factor. More surfaces mean more prep, more material, and more time.
- Surface type: laminate, melamine, and MDF each require different primers and prep times. Solid timber (oak, ash) and UPVC need specific bonding agents. Spraying MDF cabinets is generally straightforward; spraying laminate cabinets or melamine cabinets demands more careful surface preparation.
- Colour and finish: dark colours and high-gloss finishes show imperfections more readily, so they require additional coats and finer sanding between passes.
- Repairs required: filling chips, repairing delamination, or drilling new hinge positions adds both time and material cost.
- Island units: an island adds surface area on all four sides, often adding £300–£600 to the total.
- Access and site logistics: tight spaces, high-level units, or the need to work around integrated appliances all affect the time on site.
Professional full-kitchen resprays typically cost several thousand pounds, while small DIY projects can come in under £300 with the right equipment. That gap exists because a professional brings specialist spray equipment, a full prep kit, and the experience to avoid the mistakes that cause early failure.
Common extras that push the price up:
- Filling and repairing chips or dents before priming
- Hinge drilling or soft-close hardware upgrades
- Handle removal, filling old holes, and re-drilling for new positions
- A specialist spray-resistant topcoat for high-traffic areas
Pro Tip: A quote that comes in significantly below the others almost always reflects shortcuts in prep or thinner topcoat application. Ask every contractor to specify the number of coats, the primer product, and whether sanding between coats is included. If they cannot answer those questions, the low price is not a saving.
When weighing the cost of replacement against a respray, the numbers rarely favour replacement for structurally sound kitchens. New cabinet sets, fitting, and associated works routinely run to £8,000–£20,000 or more. A respray at a fraction of that cost, backed by a solid warranty, is a genuinely different proposition.
What do standard, premium, and factory-finish tiers actually include?
Most professional spraying contractors commonly offer multiple service levels with varying names. Here is how they typically break down.
Standard tier
Covers degreasing, light sanding, one coat of primer, and two coats of topcoat on door and drawer fronts only. Handles are removed and refitted. Turnaround is usually two to three days on site. Warranty, if offered at all, is typically one to two years.
Standard Plus / Mid-tier
Adds sanding between coats, a second primer coat on non-porous surfaces (laminate, melamine), and a more durable topcoat product. End panels and visible carcass edges are often included. Turnaround extends to three to four days. Warranty typically two to three years.
Premium / Factory-finish tier
Full prep including degreasing with a specialist cleaner, multiple sanding stages, bonding primer on all non-porous surfaces, two or more topcoat passes with inter-coat sanding, and a final quality inspection. Includes end panels, plinths, and cornice where applicable. Some contractors offer workshop spraying at this level, removing doors entirely for a dust-free environment. Turnaround four to six days. Warranty three to five years or more.
Typical exclusions across all tiers:
- Internal carcass interiors (shelves, base boards)
- Replacement of damaged or warped doors
- Major structural repairs (broken hinges, collapsed carcasses)
- Appliance removal or reinstallation
- Worktops, splashbacks, or flooring
Optional extras to ask about:
- Handleless conversion (filling existing handle holes, routing new J-pull profiles)
- Soft-close hinge upgrades
- Colour-matched touch-up kit for minor chips post-completion
Warranty terms map closely to tier. A five-year transferable warranty is a strong signal that a contractor is confident in their materials and process — it is also a meaningful financial protection if you are selling the property.
What happens during a professional spray job, step by step?
The process follows a consistent sequence whether the work is done on site or in a workshop, though the environment affects the quality ceiling.
- Initial assessment: the contractor inspects substrate condition, notes any repairs needed, and confirms colour and finish with the homeowner.
- Door and handle removal: doors and drawer fronts are removed and numbered for accurate reassembly. Handles, hinges, and soft-close mechanisms are set aside.
- Degreasing: all surfaces are cleaned with a specialist degreaser (often a TSP-equivalent or dedicated kitchen degreaser) to remove cooking grease, wax, and silicone residue. This step cannot be skipped on kitchen surfaces.
- Sanding and abrading: surfaces are sanded to create a mechanical key, particularly on laminate, melamine, and UPVC where paint will not bond to a smooth, non-porous finish without abrasion.
- Priming: a bonding or adhesion primer is applied. On timber, a stain-blocking primer prevents tannin bleed. On laminate and melamine, a specialist bonding primer is non-negotiable.
- Spraying: topcoat is applied in multiple passes, typically using an HVLP gun for doors and an airless or HEA airless for carcasses and large flat areas. Airless equipment delivers fast, even coverage on large surfaces, but correct masking and a cross-coat pattern are essential to control overspray and avoid runs.
- Drying and inter-coat sanding: each coat is allowed to flash off before the next. Between coats, light sanding removes any dust nibs or texture.
- Reassembly and final checks: doors are rehung in their numbered positions, handles refitted, and the contractor walks through the finished kitchen with the homeowner.
Typical timeline:
- Workshop spraying, where doors are removed and painted off-site, typically takes several working days including removal, spraying, curing, and refitting
- On-site spraying generally occurs over a few days depending on kitchen size and site access. The kitchen is usually usable in the evenings once the day's work area is ventilated.
Safety note: spraying on site releases volatile organic compounds (VOCs) from both the primer and topcoat. Food, small appliances, and soft furnishings should be moved out of the kitchen before work begins. The contractor should mask all adjacent surfaces, appliances, and flooring. Adequate ventilation — open windows and ideally a fan exhausting to outside — is required throughout. Homeowners with respiratory sensitivities should plan to be out of the property during active spraying.
Pro Tip: Painting doors flat and using a spray tent significantly reduces dust contamination and overspray on surrounding surfaces. Numbering each door before removal prevents reassembly errors, especially in kitchens with mixed door heights.

Which primers and topcoats work best on kitchen cabinets?
Material choice is where a professional respray earns its cost. The wrong primer on a laminate surface will peel within months regardless of how good the topcoat is.
Primers by substrate:
- Laminate and melamine: a dedicated bonding primer or melamine-specific adhesion primer. Laminate surfaces cannot absorb paint, so sanding to dull the sheen and applying a bonding primer are both required for a durable result. Standard primers will not hold.
- MDF: a high-build primer seals the porous surface and prevents the topcoat soaking in unevenly. Two coats are often needed on raw MDF edges.
- Solid timber (oak, ash, pine): a stain-blocking primer prevents tannin and resin bleed, which would discolour light topcoats. Spraying oak cabinets without a stain-blocker is a common mistake that shows up as yellow patches within weeks.
- UPVC: specialist UPVC adhesion primer. Standard bonding primers designed for wood substrates do not flex with UPVC's thermal movement and will crack.
Topcoat options:
- Waterborne alkyds: good hardness and a smooth finish, low odour, and relatively fast recoat times. A solid choice for most domestic kitchens.
- Two-part lacquers (2K): the hardest-wearing option, used in factory cabinet production. Excellent resistance to grease, moisture, and impact. Requires careful mixing and a respirator during application; not suitable for DIY.
- Acrylic urethanes: a middle ground, offering better flexibility than 2K and easier application, with good durability for medium-traffic kitchens.
For high-traffic kitchens, choosing a durable topcoat such as a waterborne alkyd or two-part lacquer is what determines whether the finish survives daily wiping and grease exposure — colour choice alone does not.
Finish sheens and their trade-offs:
| Finish | Durability | Cleaning ease | Shows imperfections |
|---|---|---|---|
| Matt | Moderate | Harder to wipe | Less |
| Satin/eggshell | Good | Easy to wipe | Moderate |
| Semi-gloss/gloss | Excellent | Very easy | More |
Matt, satin, or gloss each suit different kitchens. Satin and eggshell are the most popular choice for family kitchens because they balance easy cleaning with a forgiving surface that does not highlight every fingerprint. Gloss suits modern handleless designs but demands a flawless substrate and application.
The link between material choice and warranty is direct: contractors who use two-part lacquers or high-quality waterborne alkyds can confidently offer longer warranties because the products are proven to last. A contractor offering a five-year warranty on a budget acrylic topcoat should prompt questions.
Should you attempt a DIY respray or hire a professional?
The honest answer depends on the scale of the job and your tolerance for a finish that falls short of factory standard.
What a DIY respray actually requires:
- An HVLP spray gun (gravity-feed, 1.4–1.8mm tip) for doors and smaller surfaces. HVLP guns in the 1.4–1.8mm tip range are the standard recommendation for cabinet projects because they give finer control and less overspray than larger airless nozzles.
- A turbine unit or compressor capable of sustaining the gun's air demand
- A spray tent or dedicated spraying area for doors
- Full masking materials for carcasses, appliances, and flooring
- Bonding primer, topcoat, and sanding supplies
- A half-face respirator with organic vapour cartridges (not just a dust mask)
Common DIY pitfalls:
- Skipping or rushing the degreasing stage, leading to fish-eye and adhesion failure
- Using the wrong primer on laminate or melamine, causing peeling within weeks
- Orange peel texture from incorrect gun distance or air pressure
- Runs and sags from too-heavy a coat or insufficient flash-off time between passes
- Reassembling doors before the topcoat has fully cured (typically 7–14 days for full hardness)
DIY is viable for a single door, a small bathroom cabinet, or a few drawer fronts where the stakes are low and the learning curve is acceptable. For a full kitchen, a handleless island, or any surface with laminate or melamine, the margin for error is narrow and the cost of redoing the work often exceeds what a professional would have charged.
Pro Tip: Always wear a half-face respirator with organic vapour cartridges when spraying, not a paper dust mask. Set up cross-ventilation before you start and keep it running for at least an hour after the final coat. Contain overspray with a spray tent or dedicated sheeting — it travels further than you expect and settles on everything.
How to choose a kitchen cabinet spraying contractor
A good contractor is not hard to find if you know what to look for. The checklist below takes ten minutes to work through and will filter out most of the poor-quality options.
Hiring checklist:
- Public liability insurance: ask for the certificate, not just a verbal confirmation.
- Written, itemised quote: every line item should be listed — prep, primer, topcoat, number of coats, inclusions, and exclusions.
- Portfolio of completed work: before-and-after photos of kitchens similar to yours (substrate, colour, finish).
- Warranty in writing: minimum two years for a standard job; five years is achievable with quality materials and process.
- Substrate experience: confirm they have sprayed your specific surface type (laminate, MDF, solid oak, UPVC).
- Local references: a recent customer in your area who can speak to the finish quality and how the contractor handled any issues.
- No subcontractors: the person who quotes is the person who sprays. Subcontracting introduces a quality variable the contractor cannot fully control.
Questions to ask before signing:
- What primer do you use on laminate/melamine surfaces, and why?
- How many coats of topcoat do you apply, and do you sand between coats?
- What is the full cure time before I can use the kitchen normally?
- How do you protect appliances, worktops, and flooring during spraying?
- Is the warranty transferable if I sell the property?
- Who physically carries out the work?
Red flags:
- Verbal quote only, with no written breakdown
- Vague warranty wording ("we guarantee our work" with no defined period or scope)
- A price significantly below market rate with no explanation of prep process
- No before-and-after photos, or photos that are clearly stock images
- Reluctance to name the primer or topcoat products they use
Why preparation decides whether a respray lasts
Every experienced refinisher says the same thing, and the evidence backs them up: the finish is only as good as the surface beneath it.
Sanding with aluminium-oxide grit and using a high-quality bonding primer are necessary for laminate and non-porous cabinet finishes because standard paint will not adhere reliably without creating a mechanical bond. This is not a preference — it is a physical requirement of non-porous surfaces. Laminate, melamine, and UPVC have no open grain for paint to grip. Without abrasion and a bonding primer, the topcoat sits on the surface rather than bonding to it, and it will lift.
Preparation is the decisive factor in whether a sprayed kitchen finish lasts or peels. Degreasing removes the invisible layer of cooking oil that prevents adhesion; sanding creates the mechanical key that bonding primers need to work; and priming seals the surface so the topcoat cures evenly. Cut any one of these steps and the finish is compromised before the first topcoat goes on.
Inspection checks a homeowner can carry out before accepting a quote:
- Run a fingernail along a door edge. If the laminate lifts or sounds hollow, delamination has already started and needs repair before spraying.
- Wipe a door with a white cloth dampened with white spirit. If the cloth picks up a yellow or brown residue, the surface has not been properly degreased and any quote that skips this step will fail.
- Check hinges and hinge plates for rust or stripped screws. These should be flagged in the quote as repairs, not ignored.
- Smell the inside of base units. Persistent cooking smells indicate grease penetration that may affect adhesion on adjacent surfaces.
Common mistakes that lead to premature failure:
- Degreasing with washing-up liquid rather than a specialist degreaser (leaves a surfactant film)
- Sanding with too fine a grit (240+ on laminate) and not creating enough mechanical key
- Applying topcoat before the primer has fully dried
- Rushing reassembly before the topcoat has cured, causing hinge marks and chips
Refinishingstudio's approach to kitchen respraying in South Wales
Refinishingstudio works exclusively on UPVC and kitchen surfaces across South Wales, which means every job the team takes on sits within a narrow, well-practised specialism. The hand-spray technique used on every kitchen project is applied to factory-standard tolerances, with no subcontractors involved at any stage. The person who quotes is the person who sprays.
The five-year transferable warranty covers every kitchen respray, and it transfers to a new owner if the property is sold, which makes it a meaningful addition to a home's value rather than just a service guarantee. With over 1,000 completed projects across South Wales, the portfolio covers laminate, MDF, solid timber, and UPVC substrates in a full range of RAL and BS colours, across matt, eggshell, satin, and gloss finishes.
For homeowners in South Wales weighing whether kitchen cupboard spraying is worth it, the combination of a written warranty, a documented portfolio, and a no-subcontractor policy addresses the three most common concerns: will it last, will it look right, and will the person who quoted actually turn up?
Get a quote from Refinishingstudio
Refinishingstudio offers a straightforward route to a written, itemised quote for kitchen cabinet spraying across South Wales, without the lengthy back-and-forth that makes some contractors frustrating to deal with.

The kitchen respraying service page covers the full range of substrates, finishes, and colour options, with portfolio examples showing completed work on laminate, MDF, and solid timber kitchens. The price guide sets out typical cost brackets and what is included in a standard written quote, so you can arrive at the conversation with realistic expectations. To see finished examples before committing, the portfolio includes before-and-after photographs from completed South Wales projects.
To request a quote, visit the kitchen cabinet spraying service page and submit your details. A response with an initial estimate typically follows within one working day.
Sources
- Learn how to paint laminate kitchen cupboards | Homebuilding
- How to spray paint cabinets: the complete step-by-step guide to a flawless finish (2026) | Spray Painter Guide
- How to paint kitchen cabinets with a paint sprayer (What I wish I knew first) | AllisonSkiff
- Painting kitchen fronts: Instructions for professionals | WAGNER