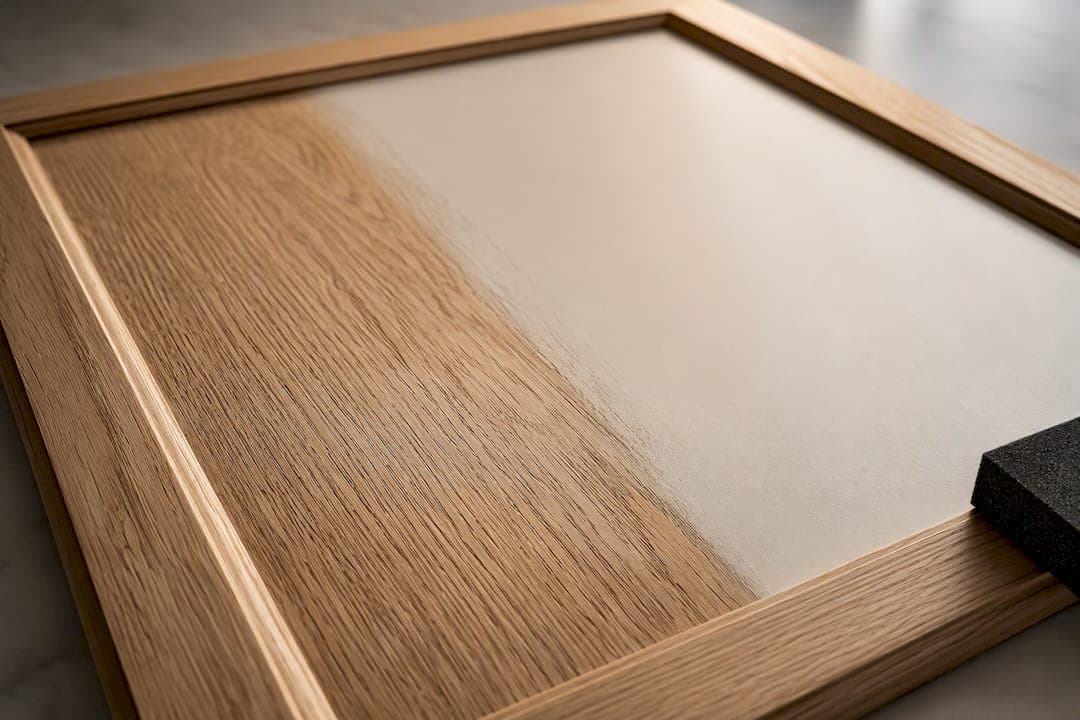
Yes, you can substantially remove visible oak grain and get a flat painted finish, but paint alone will never do it. You need either a grain filler worked into the pores or a professional sealer plus high-build primer system. DIY paste and water-based fillers get most homeowners a smooth-enough result with patience and sanding; professional systems get you closer to factory-flat.
TL;DR:
- DIY grain filling can produce acceptable results for small projects, but it requires extra sanding and may not last as long as professional systems.
- Professional refinishing systems use a tannin sealer and high-build primer to level the grain and offer more durability than paste fillers alone.
- A full kitchen’s oak cabinets benefit from spray-applied primer and sealer for a smoother, more consistent finish that resists cracking and chipping over time.
- Choosing a cabinet-grade water-based filler or paste filler reduces sanding time and improves the overall flatness of the painted surface.
- For large jobs, hiring professionals typically results in a factory-flat finish with less disruption and a five-year warranty, justifying the higher cost.
Table of Contents
- Grain filling oak cabinets: professional system or DIY?
- How to fill grain in oak cabinets step by step
- Which grain filler suits oak cabinets best?
- Fixing common grain filling problems
- Is DIY grain filling worth it, or should you call a professional?
- Refinishing Studio: the professional alternative to grain filling oak cabinets yourself
- Sources
- FAQ
Grain filling oak cabinets: professional system or DIY?
Oak has open pores running the length of the grain, and paint simply bridges over them rather than filling them. That's why a freshly painted oak door can look glossy and even from three feet away, then reveal every ridge and valley the moment light rakes across it. Skipping the grain-fill step frequently results in the grain telegraphing through multiple coats of primer and paint, no matter how many coats you add. Filling the grain first is what turns "painted oak" into something that reads as a smooth, coated surface.
Professional refinishers tend to favour a different route from most DIY guides. Rather than packing pores with paste filler, they lock the tannins with a sealer, then build up two coats of high-build primer that level the grain as they cure. It's a matched system: sealer, primer and topcoat are chosen to work together, which cuts the risk of one layer rejecting another. That matters more than it sounds. Heavy paste filler can crack as the wood expands and contracts with humidity, especially on wide door panels, whereas a primer system flexes with the substrate and keeps its bond.
The DIY workflow looks different but gets you a genuinely usable result. You mix a paste or water-based filler, work it into the pores, sand it back, then prime and paint. It costs less and puts you in control of the schedule, but it asks more of your time and your sanding arm. Filler can also shrink slightly as it dries, so some doors need a second pass before the surface reads as truly flat.
Here's how the two approaches actually stack up:
- Durability: professional sealer and primer systems resist chipping and cracking better over years of daily cupboard use; DIY paste fillers can crack on high-movement panels if applied too thick.
- Finish quality: spraying a matched primer system gets closer to a true factory-flat surface than brush-applied filler, which almost always shows some texture close up.
- Time investment: DIY typically adds a full day or more of sanding and filling per set of doors; professional systems compress this because spray equipment lays down even coats fast.
- Cost: DIY materials for a full kitchen run into the low hundreds of pounds; professional respraying costs more but includes labour, equipment and a finished, guaranteed result.
- Disruption: DIY keeps your kitchen out of action for days while things dry and cure between coats; a professional crew working off-site or on a tight schedule minimises the downtime.
If you're doing one cupboard door or a small utility unit and don't mind a bit of visible grain up close, DIY filler is the sensible call. If you're repainting an entire kitchen and want a result that won't show brush marks or hairline cracks in a year's time, a professional sealer and primer system is the safer bet.
How to fill grain in oak cabinets step by step
This is the process to follow if you're doing the work yourself, from bare doors to paint-ready surface.
What you'll need:
- Degreaser or TSP substitute for cleaning
- 120, 150 and 220 grit sandpaper, plus a sanding block or orbital sander
- Paste or water-based grain filler
- A flexible plastic spreader or old credit card
- Tack cloths
- Tannin-blocking sealer or shellac-based primer
- High-build primer
- Cabinet paint and a brush, roller or sprayer
- Dust mask or respirator, and a work area with decent ventilation
Steps:
- Remove doors and hardware. Take doors and drawer fronts off, remove handles and hinges, and label everything with masking tape so it goes back exactly where it came from.
- Clean thoroughly. Wipe down every surface with degreaser to strip kitchen grease and cooking residue. Paint and filler won't grip over a greasy film, no matter how well you sand afterwards.
- Inspect the substrate. Check whether you're dealing with solid oak, oak veneer, or a laminate that mimics oak grain. Solid oak and veneer both take filler well; a laminate finish usually doesn't need grain filling at all since there's no real pore structure to pack.
- Sand to open the grain and remove old finish. Start at 120 grit to cut through any existing lacquer or wax, then move to 150. Sand with the grain, not across it, to avoid scratches that show under paint. Wipe with a tack cloth and check the surface under raking light (a torch held low and angled across the panel) to spot missed patches.
- Mix your filler to a workable paste. Water-based fillers are usually applied at roughly the consistency of thick yoghurt; too thin and it won't pack the pores, too thick and it drags.
- Apply against the grain. Brush or spread the filler across the grain direction rather than along it. This forces material down into the pores instead of skimming over the top, which is the single most repeated tip across practical grain-filling guides.
- Scrape off the excess. While the filler is still workable, drag a plastic spreader across the surface at a shallow angle to pull off everything sitting above the pores. Only the filler left inside the grain should remain once you've scraped — anything left on the surface just adds sanding work later.
- Let it dry fully. Follow the product's stated drying window, typically a few hours for water-based fillers, longer in cool or humid rooms. Rushing this step is the most common cause of filler dragging or smearing during sanding.
- Sand the filled surface. Work through 150 then 220 grit, feathering the edges where filler meets bare wood so there's no ridge. Run a hand across the panel and check under raking light again. If grain still shows in patches, apply a second thin pass of filler there rather than recoating the whole door.
- Seal and block tannins. Oak is naturally high in tannins that can bleed yellow or brown stains through white and pale paint over time. A dedicated tannin-blocking sealer stops this before it starts.
- Prime with a high-build product. A high-build primer fills any remaining texture and gives paint something consistent to grip. Sand lightly between coats with 220 grit and wipe down before the topcoat.
- Paint. Brush and roller work fine on flat panel faces if you thin the paint slightly and use a quality mini-roller to avoid stipple marks. If you can rent or borrow a fine-finish sprayer, it lays down a thinner, more even coat with far less risk of brush marks telegraphing through, which is closer to the finish a professional respray achieves.
Pro Tip: Test your filler and sanding sequence on the inside of a cabinet end panel first. Oak grain depth varies noticeably between boards, so what takes one pass on a tight-grained door might need two on a more open one.
Which grain filler suits oak cabinets best?
Walk into a hardware shop looking for "grain filler" and you'll find several product families that all claim to do the job. They don't all behave the same way on oak, and the wrong choice adds hours of extra sanding.
- Water-based grain fillers (the Aqua Coat type) are low odour, purpose-made for this job, and clean up with water. The trade-off is that oak's deep grain sometimes needs two or three passes rather than one to fully pack the pores.
- Cabinet-specific paste fillers, sometimes sold as cabinet mud, are formulated to stay stable across a whole kitchen's worth of doors. They cost more per tub but sand cleanly and hold up better over a large project than general-purpose alternatives, which usually saves time overall.
- Glazing putty or automotive body filler cures fast and is genuinely strong, which makes it tempting for a quick spot repair on a dented corner. It's high in VOCs, unpleasant to sand in a kitchen with no proper extraction, and overkill for filling grain across dozens of doors.
- Drywall joint compound is cheap and sitting in most garages already. It works in a pinch, but it can shrink as it dries or soften again if moisture gets to it before you've properly sealed the surface. Fine for a single test door, riskier for a whole kitchen you want to last.
- Homemade oil or sawdust slurries have a long history in traditional wood finishing and can work well under a clear or stained finish. Under paint, they're harder to control for colour consistency and add an extra drying stage most DIYers don't need for this job.
For a full set of oak cabinets, a cabinet-grade paste filler or a water-based product built for this purpose beats reaching for whatever's left over from another project. The time saved in sanding alone usually justifies the extra cost of the right tub.
Fixing common grain filling problems
Even a careful job throws up the odd surprise. Most issues are fixable without stripping back to bare wood.
- Grain still visible after priming: check under raking light before you touch the paint. A patchy area usually needs one more thin fill-and-sand pass, not a full second coat of primer over everything.
- Filler cracking on wide panels: this points to applying it too thickly in one go. Strip the cracked section back, apply thinner coats, and let each one cure fully before sanding.
- Yellow or brown staining bleeding through white paint: that's tannin bleed, and it needs a proper tannin-blocking sealer or shellac-based primer over the affected area, not another coat of standard primer.
- Grain feels raised and rough after a water-based filler dries: a quick pass with 220 grit knocks this back down; re-fill any spots that feel hollow afterwards.
- Uneven texture across a door: run your hand over the surface with eyes closed, then check again under a torch held at a low angle. Hands catch texture that eyes miss under normal room lighting.
Pro Tip: Keep a torch angled low across every panel before you commit to priming. Raking light shows flaws that disappear the moment you switch on the overhead kitchen light.
Is DIY grain filling worth it, or should you call a professional?
DIY grain filling makes sense for a single door, a small run of drawer fronts, or a project where minor imperfections close up genuinely don't bother you. Expect more sanding than you think, and budget time for touch-ups after the first coat of paint reveals what you missed.
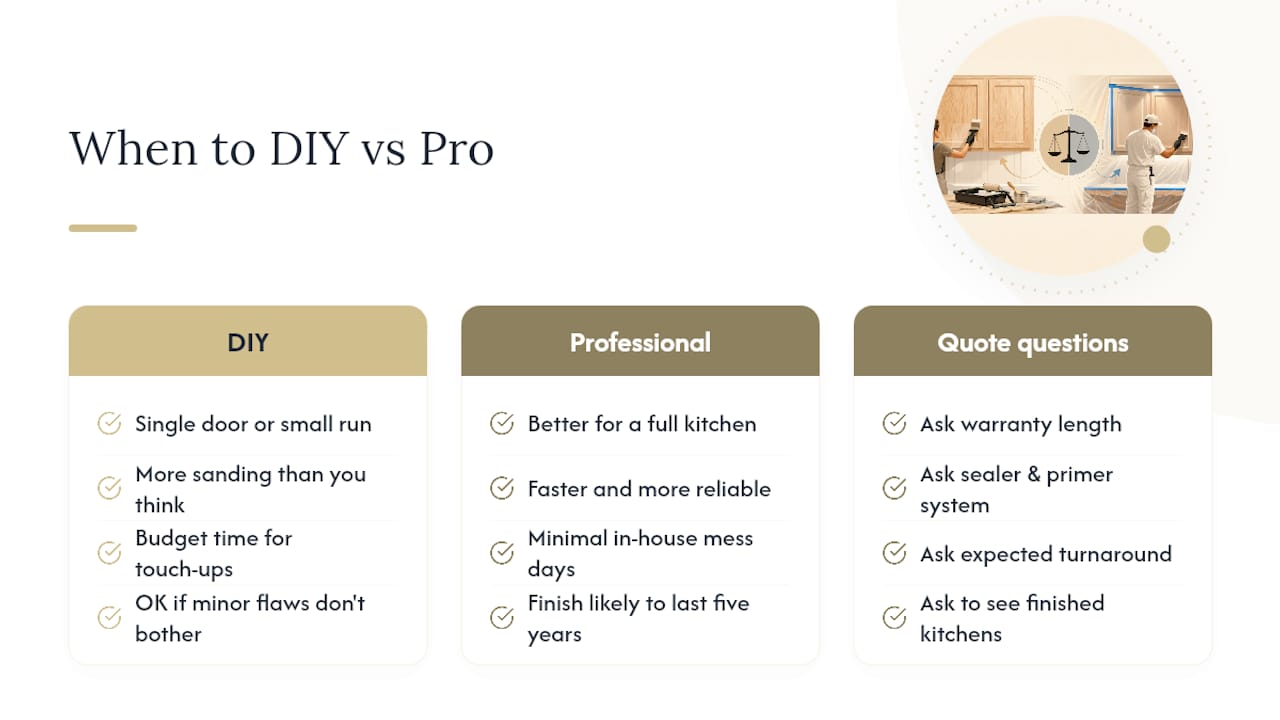
A full kitchen is a different calculation. If you want every door to match, minimal mess in your house for days on end, and a finish that's still holding up in five years, a professional spray system usually gets you there faster and more reliably than DIY ever will.
If you're weighing up a quote, ask about the warranty length, the sealer and primer system used, expected turnaround, and whether they can show you finished kitchens rather than just samples.
— Mitchell
Refinishing Studio: the professional alternative to grain filling oak cabinets yourself
If sanding a whole kitchen's worth of oak doors sounds like more weekend than you've got, a professional hand-spray respray service can skip the DIY grind entirely. Rather than mixing filler in your garage, a survey and quote gets your cabinets assessed, matched to the right prep system, and sprayed to a factory-standard finish, in whatever colour and sheen suits your kitchen.

Every job comes with a five-year warranty, and the kitchen respraying portfolio shows finished oak kitchens rather than close-up samples, so you can see how the grain disappears under a sprayed finish before you commit. Refinishing Studio works across South Wales with no subcontractors involved, meaning the person surveying your kitchen is the same team spraying it.
If you'd rather book a survey than buy a sanding block, start with the kitchen respraying service page for what to expect and how a quote is put together, or check the kitchen respraying cost guide if you're comparing DIY material costs against a professional quote before you decide.
Sources
- Rubiomonocoat — tannin primer / product info
- How to fill wood grain before painting — Woodshop Diaries
- The best grain filler for oak cabinets — DIY Painting Supply
- How to paint oak cabinets and hide the wood grain — Cesar's Painting
FAQ
What is the best grain filler for oak cabinets?
For a full kitchen, a cabinet-grade paste filler or a purpose-made water-based filler tends to sand more cleanly and stay stable across dozens of doors than general-purpose products like drywall compound. Professional refinishers often skip filler altogether and use a tannin sealer plus high-build primer system instead, which resists cracking better over time.
How can I fill the grain in my oak cabinets?
Mix a paste or water-based filler to a yoghurt-like consistency, apply it across the grain to pack the pores, then scrape off the excess with a plastic spreader before it fully dries. Once cured, sand through 150 and 220 grit and check the surface under raking light before priming.
What is the best filler for oak wood before painting?
Cabinet-specific paste fillers and water-based grain fillers both work well on oak, though oak's deep pores sometimes need two or three passes of a water-based product to fill completely. Avoid drywall mud or automotive body filler for a whole kitchen since they can shrink, resoften, or turn sanding into an unpleasant chore.
How do you hide oak wood grain under paint?
Grain filler packs the open pores so paint sits on a flat surface instead of bridging over ridges that show through as telegraphing. A high-build primer applied after filling and sealing adds a final levelling layer, which is the same approach professional cabinet refinishers rely on for a smooth, factory-style finish.