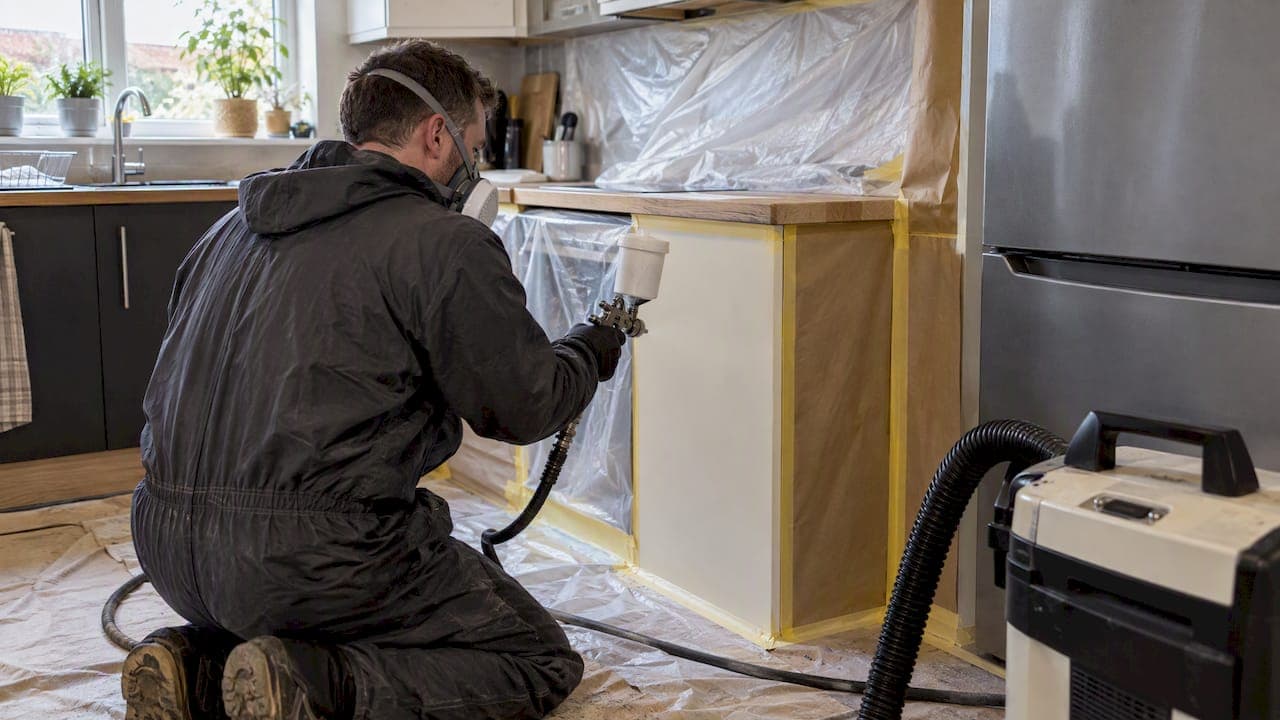
Yes, fixed kitchen end panels can be sprayed in place, and removable doors are often sprayed off-site in a workshop booth. Whether you tackle this yourself depends largely on the paint chemistry: water-based acrylics are manageable for a confident DIYer, but two-pack (2K) products demand professional-grade safety controls. The sections below walk through both methods, the prep work, and when to call in a specialist.
TL;DR:
- In-situ spraying is typical for fixed end panels to avoid dismantling, but the finish quality may be slightly lower than workshop spraying, which is better for removable parts.
- Proper surface preparation, including degreasing, abrading, and masking, is essential to achieve a durable and smooth spray finish.
- Using isocyanate-based paints like 2K polyurethane requires strict safety controls, including proper extraction, protective equipment, and adherence to health guidelines.
- DIY spraying suits water-based paints on good-condition panels but often results in overspray, uneven sheen, or runs without professional equipment and safety measures.
- Costs for end panel spraying in the UK generally range from £70 to £160 per panel, with full kitchen resprays between £1,200 and £2,000, depending on scope and extras.
Table of Contents
- In-situ spraying versus workshop spraying: which method fits end panels?
- Preparing and masking end panels before you spray
- What UK safety rules say about isocyanates and spray mist
- DIY or professional: what you'll actually end up with
- Choosing the right paint and finish for end panels
- What it costs and how long it takes
- How to vet a contractor before you book
- A publisher's take on specialist spraying
- Get a professional finish on your kitchen end panels
- FAQ
- Sources
In-situ spraying versus workshop spraying: which method fits end panels?
End panels are usually fixed to the carcass, so they cannot travel to a spray booth the way a cabinet door can. This is why professionals typically use in-situ spraying for panels: masking off the surrounding worktops, flooring and appliances, then setting up local extraction before applying coats directly in the kitchen. It avoids dismantling the carcass but relies heavily on good masking and airflow control to stop overspray settling on finished surfaces.
Workshop spraying, by contrast, suits anything that unscrews, such as doors and drawer fronts. These go into a controlled booth with filtered extraction, consistent lighting and a dust-free environment, which produces a more even, factory-like finish because contamination risk drops sharply. The trade-off is time: parts spend a few days off-site while they are stripped, sprayed and cured.
Finish quality tends to favour the booth, but practicality often wins for end panels since removing them can mean additional carpentry, repair work and reassembly risk. According to UK pricing data, professional resprayers commonly spray fixed end panels in situ while sending removable doors to a workshop, balancing finish and disruption.
In practice, most jobs use a mixed approach:
- Fixed end panels, filler strips and some carcass faces are masked and sprayed on-site.
- Doors, drawer fronts and any detachable trim are removed and sprayed in a booth.
- Hardware, hinges and handles are masked or removed rather than sprayed over.
This hybrid workflow is now close to an industry norm because it keeps disruption manageable while still delivering a smooth, durable coat on the parts that benefit most from controlled conditions.
Preparing and masking end panels before you spray
Good prep decides whether a sprayed finish lasts five years or peels within months. The steps below reflect what a competent DIYer or contractor should follow for a typical melamine, foil or painted timber end panel.
- Degrease the panel thoroughly with a sugar soap solution or a dedicated degreaser, paying extra attention to areas near the hob or worktop where grease builds up.
- Abrade the surface with a fine grit sandpaper (around 320-400 grit) or a scuff pad to key the existing finish so the new coat bonds properly.
- Fill any chips, dents or old screw holes with a flexible filler suited to the substrate, then sand flush once cured.
- Treat exposed edges, especially on veneered or foil-wrapped panels, so the original colour or substrate doesn't peek through where the panel meets a door or worktop.
- Mask worktops, flooring, appliances and adjoining cabinetry with heavy-duty sheeting and tape, sealing every join to stop drift.
- Decide whether any trim, end-panel capping or adjacent fittings need removing for access, rather than masking around them, if the join is too tight to spray cleanly.
Pro Tip: Run your hand flat across a sanded panel before priming. Any dip or ridge you can feel will show under a sprayed finish far more than it would under a brushed one.
Removal is sometimes unavoidable, particularly where an end panel butts against a wall or another unit with almost no gap. In those cases, taking the panel down for a few hours and spraying it on trestles can produce a cleaner result than trying to mask an impossible angle.

What UK safety rules say about isocyanates and spray mist
This is the part most homeowners skip past, and it's the one that matters most. Many professional cabinet paints, including 2K polyurethanes, contain isocyanates, and spraying them releases a fine mist that is dangerous to breathe even in small quantities.
SMART spraying, the quick, localised repair technique often used for small panels, is sometimes assumed to carry lower risk because the job is small. HSE guidance makes clear this isn't true: SMART spraying can still generate high levels of invisibly fine isocyanate mist, and the size of the repair is not a reliable guide to how much hazardous mist is produced.

A single short SMART repair can create peak isocyanate exposures that may be comparable to a full respray, which is why HSE guidance warns against treating quick jobs as inherently safer.
Where 2K or isocyanate-based products are used, HSE sets out specific controls:
- A proper spray booth or spray room, rather than an open kitchen, wherever practical.
- Extraction that keeps the space under negative pressure, so mist is pulled away rather than drifting.
- A measured clearance time before anyone re-enters without protection, often checked with a smoke test.
- Air-fed breathing apparatus with an assigned protection factor of at least 20 for anyone present during spraying, as set out in HSE's isocyanate spraying guidance.
- Regular thorough examination and testing of booths and breathing equipment, which HSE's two-pack product guidance recommends at intervals of roughly every 14 months.
If you're hiring someone to spray 2K products, ask directly what respiratory protection they use, where the work will take place and how they manage clearance time. A contractor who shrugs off these questions, or plans to spray reactive paint in an open kitchen with just a dust mask, is not following the guidance that protects both them and you. For this reason, DIY use of 2K or isocyanate products is generally inadvisable unless you can genuinely replicate booth-level extraction and air-fed protection at home.
DIY or professional: what you'll actually end up with
A DIY spray job can work well for low-risk, water-based products on panels in good condition, but it has real limits. Equipment for a basic attempt typically includes a HVLP spray gun, a compressor or turbine unit, decent masking film, and a dust mask rated for the paint in use, though a dust mask is not adequate for 2K products.
- Overspray and dust nibs are the most common DIY faults, usually from spraying in a non-sealed space.
- Uneven sheen or visible brush marks near edges often come from rushing the final coat before the primer has fully cured.
- Runs and sags typically result from applying coats too thickly in an attempt to get full coverage in one pass.
Professionals bring workshop booths for removable parts, trained hand-spray technique for in-situ panels, and controlled curing conditions that reduce dust nibs and uneven sheen. A melamine-specific DIY guide is worth reading if you're set on doing panels yourself, since melamine behaves differently to painted timber under a sprayed coat.
A sensible middle ground for many homeowners is a hybrid approach: handle filling, sanding and masking prep yourself, then bring in a specialist purely for the spraying and curing stage where the equipment and safety requirements are hardest to match at home.
Choosing the right paint and finish for end panels
The coating you choose affects both appearance and how the panel behaves day to day. Water-based acrylics are the most DIY-friendly option, low odour and reasonably durable, but they generally don't match the hardness of a proper 2K polyurethane. One-pack (1K) paints sit in between: easier to apply than 2K but less chemically resistant. Automotive-style lacquers, usually 2K, give the hardest and most factory-like finish but come with the isocyanate handling requirements covered above.
- Matt and eggshell finishes hide minor surface imperfections well but can mark more visibly around handles and high-touch areas.
- Satin and gloss sheens clean more easily and show off a smooth sprayed finish, though they're less forgiving of any prep flaws.
- Choosing a slightly lower sheen on busy kitchen end panels can reduce visible fingerprints, an approach echoed in general advice on pairing low-sheen walls with durable topcoats in kitchens.
Edge handling matters most on veneered, foil-wrapped or melamine panels, where the substrate colour can show through at corners if the edge isn't properly sealed or built up with extra coats. Colour matching is usually done against RAL or BS reference systems, with small-batch custom mixes used when a homeowner wants a shade that isn't a standard stock colour.
What it costs and how long it takes
Quotes for end panel spraying are usually structured per item or folded into a whole-kitchen price, so it helps to know what's typical before comparing contractors.
- Standalone end panels commonly run around £70 to £160 each, while individual doors sit lower, at roughly £55 to £95, according to UK kitchen cupboard spraying price guidance.
- A medium kitchen respray, covering doors, drawer fronts and panels together, commonly falls between £1,200 and £2,000 depending on scope, per the same guidance.
- Optional extras such as transport (£60 to £200), carcass spraying (£350 to £900) and repair work (£40 to £350) can push the total well beyond the base quote.
- In-situ work on fixed panels is usually quicker to complete on the day but may need longer clearance time before the kitchen is usable again; workshop jobs take parts away for several days but let you use the rest of the kitchen meanwhile.
For a fuller breakdown of how these quotes are typically built, our guide to kitchen cabinet spraying costs and process covers the full range of cost drivers.
How to vet a contractor before you book
A short checklist saves a lot of grief once spraying has started.
- Ask what paint chemistry they use, specifically whether it's 2K or isocyanate-based, and how they handle extraction and clearance time.
- Confirm where the spraying actually happens: on-site, in a mobile booth, or taken to a workshop.
- Ask what respiratory protection operators wear, since a simple dust mask is not adequate for reactive paints.
- Check what warranty is offered and whether it's transferable if you sell the property.
- Request a written quote that itemises every panel, door and edge included, not a vague lump sum.
- Look for a portfolio or documented case studies showing comparable work, not just stock photography.
Red flags include a quote with no breakdown, reluctance to answer safety questions, or a warranty offered only verbally with nothing in writing.
A publisher's take on specialist spraying
We offer hand-spray respraying with a five-year transferable warranty, so fixed end panels get masked and sprayed in place while removable doors go through a controlled process for a factory-standard finish. Our honest advice: handle your own filling and sanding if you're confident, but leave 2K spraying to trained hands.
— Mitchell
Get a professional finish on your kitchen end panels
We offer hand-spray respraying for kitchen cabinets, doors, drawer fronts and end panels, using the same factory-standard coatings whether the job is a single end panel or a full handleless conversion. We provide a five-year transferable warranty and manage the quoting, prepping and spraying of each job to ensure quality and consistency.

A typical quote covers:
- Every panel, door and edge included in the scope, listed individually rather than lumped together.
- Masking and protection of worktops, flooring and appliances for in-situ panel work.
- Colour matched to RAL, BS or a custom shade, with your choice of matt, eggshell, satin or gloss.
If you'd like a clear, itemised quote for your kitchen cupboard spraying or want to browse our kitchen respraying services first, getting in touch costs nothing and you only pay once you're happy with the finished result.
FAQ
Is spraying kitchen cabinets a good idea?
Spraying is a practical way to refresh cabinets and end panels without replacing the whole kitchen, provided the paint chemistry and surface prep are right for the substrate. It works best when fixed panels are sprayed in situ and removable doors are sprayed in a controlled booth, which reduces dust contamination and gives a more even finish.
How much does it cost to respray kitchen cabinets?
Standalone end panels typically cost around £70 to £160 each, while individual doors run roughly £55 to £95, according to UK kitchen cupboard spraying price guidance. A medium whole-kitchen respray commonly falls between £1,200 and £2,000, though extras like transport, carcass spraying or repairs can add to that.
What makes a kitchen look cheap?
Uneven sheen, visible brush marks, and mismatched colours at panel edges are common giveaways of a rushed finish. Choosing a consistent sheen, properly sealing edges on veneered or foil panels, and colour-matching through RAL or BS systems all help avoid that look.
Is it better to spray or wrap kitchen cupboards?
Spraying generally gives a harder, more factory-like finish and allows a wider choice of custom colours, while wrapping can be quicker for simple colour changes on flat surfaces. The right choice depends on the condition of your existing doors and panels and how durable a finish you need long-term.