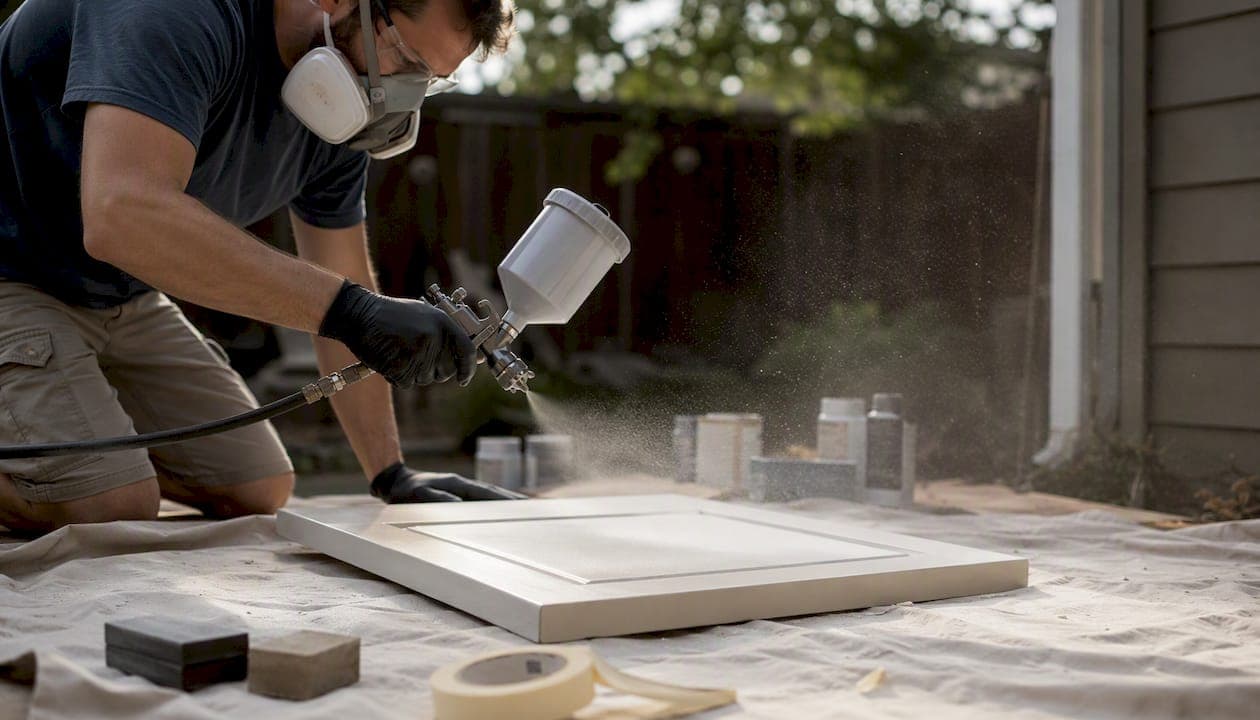
Spraying melamine cabinets produces a durable, factory-like finish — but only if you follow a specific workflow: degrease and scuff the surface, apply a melamine-bonding primer, then spray two or three thin topcoats and allow a full cure before reassembly. Skip any of those three stages and the paint will peel within months, not years. The good news is that the process is genuinely achievable for a confident DIYer with the right equipment.
Here is the short version of what the job involves:
- Prepare and decontaminate: remove doors and hardware, clean with sugar soap or a TSP substitute, and scuff-sand to 220-grit for a uniform matte surface.
- Prime with a bonding primer: products such as Zinsser Bulls Eye 1-2-3 or INSL-X Stix are specifically formulated to key into melamine's low-energy, non-porous surface.
- Spray two to three thin topcoats and cure: use a waterborne alkyd or enamel topcoat, allow the recommended recoat windows between passes, and wait the full cure period before hanging doors or using the kitchen normally.
When to hire a professional instead: if your kitchen has more than around ten doors, you want a colour-matched or high-gloss finish, or you have no experience with spray equipment, the learning curve and equipment cost tip the balance toward a professional respray. A specialist can complete the job to a guaranteed standard in a fraction of the time, with no risk of orange peel or adhesion failure.
Key takeaways
Spraying melamine cabinets produces a durable, professional-quality finish when you follow the correct sequence: thorough degreasing, scuff-sanding, a melamine-bonding primer, and thin topcoats with full cure time before reassembly.
| Point | Details |
|---|---|
| Prep is the critical stage | Degrease with sugar soap (two passes for greasy kitchens), scuff to 220-grit, and wipe with a tack cloth before priming. |
| Use a true bonding primer | INSL-X Stix or Zinsser Bulls Eye 1-2-3 are the reliable choices; standard primers will not adhere to melamine's low-energy surface. |
| Spray thin coats and respect cure times | Waterborne alkyds need 21–30 days for full hardness; rehang doors after 5–7 days but handle gently for the first three weeks. |
| Test before you commit | Spray a test panel to dial in pressure, fan width and gun distance before touching a single cabinet door. |
| Know when to call a professional | Kitchens with more than ten doors, high-gloss finishes, or colour-matching requirements are better suited to a professional respray with a written warranty. |
| Refinishingstudio for guaranteed results | Refinishingstudio provides hand-spray kitchen resprays across South Wales with a five-year warranty and no subcontractors. |
Table of Contents
- What equipment and materials do you need for spraying melamine cabinets?
- How to prepare melamine surfaces before priming
- Why primer matters for melamine and which products to use
- Which topcoat finishes hold up in a kitchen?
- Step-by-step spraying technique for melamine cabinet doors
- A realistic project timeline for painting melamine cabinets
- Common mistakes and how to fix them
- Safety, ventilation and disposal during a spray project
- When should you hire a professional instead of DIY?
- When I would DIY and when I would call a specialist
- A guaranteed professional finish from Refinishingstudio
- Sources
What equipment and materials do you need for spraying melamine cabinets?
Getting the equipment list right before you start saves a wasted trip to the trade counter mid-project. Here is what you actually need, broken down by category.
Sprayers
HVLP systems give the most control with less overspray, which makes them the sensible choice for indoor kitchen work. Two brands worth looking at are Wagner (their Control Pro range is widely stocked in UK hardware stores) and Fuji Spray (their compact Q-Series turbine HVLP systems are a step up in atomisation quality and suit anyone doing more than one room). For a one-off project, renting a quality HVLP or compact airless sprayer for a weekend is often more cost-effective than buying outright, and the result will be far better than aerosol cans for a whole kitchen.
Compact airless sprayers are faster for larger kitchens but produce more overspray and require better masking. If you go that route, budget extra time for containment.
Primers and topcoats
- INSL-X Stix waterborne bonding primer: the product most frequently recommended by trade painters for melamine and other low-energy surfaces.
- Zinsser Bulls Eye 1-2-3: widely available in the UK, water-based, and bonds reliably to melamine when the surface is properly degreased and scuffed.
- Rust-Oleum primer products: Rust-Oleum's bonding primers (including their Universal range) are another UK-available option and are stocked in most DIY sheds.
- Topcoats: waterborne alkyds (sometimes labelled "furniture enamel" or "cabinet enamel") give the best combination of hardness, low odour and water cleanup. Solvent-borne enamels are harder but slower to dry and smell significantly stronger. 2K (two-component) systems offer the toughest finish of all but require careful mixing and a suitable spray gun.
Consumables and PPE
- Sugar soap or a TSP (trisodium phosphate) substitute for degreasing
- 220-grit sanding sponges or abrasive sheets for scuffing
- Tack cloths for removing dust before each coat
- Masking film, low-tack tape and plastic sheeting for protecting worktops, walls and appliances
- Mixing sticks and a paint strainer (always strain paint before it goes into the sprayer cup)
- Nitrile gloves and safety glasses
Pro Tip: A P3 respirator is non-negotiable, not optional. Spray mist from waterborne paints still carries fine particles that irritate the lungs, and solvent-borne products carry vapour that a dust mask will not stop. Keep children and pets out of the work area for the duration of spraying and for at least an hour afterwards while the mist settles.
How to prepare melamine surfaces before priming
Surface preparation is where most DIY spray jobs succeed or fail. Melamine's factory finish is engineered to resist adhesion, so the prep stage is not something you can rush. Follow these steps in order.
- Remove all doors, drawer fronts and hardware. Take every door off its hinges and remove handles, hinges and any soft-close mechanisms. Work systematically: label each door (a piece of masking tape on the back with a marker works perfectly) and store fixings in sealed, labelled freezer bags — one bag per door or drawer.
- Degrease with sugar soap or a TSP substitute. Kitchen cabinets accumulate cooking grease that is invisible to the eye but catastrophic for paint adhesion. Mix sugar soap to the manufacturer's concentration, wipe every surface thoroughly, then rinse with clean water and allow to dry completely. Do not skip the rinse — residue from the cleaner itself can affect primer adhesion.
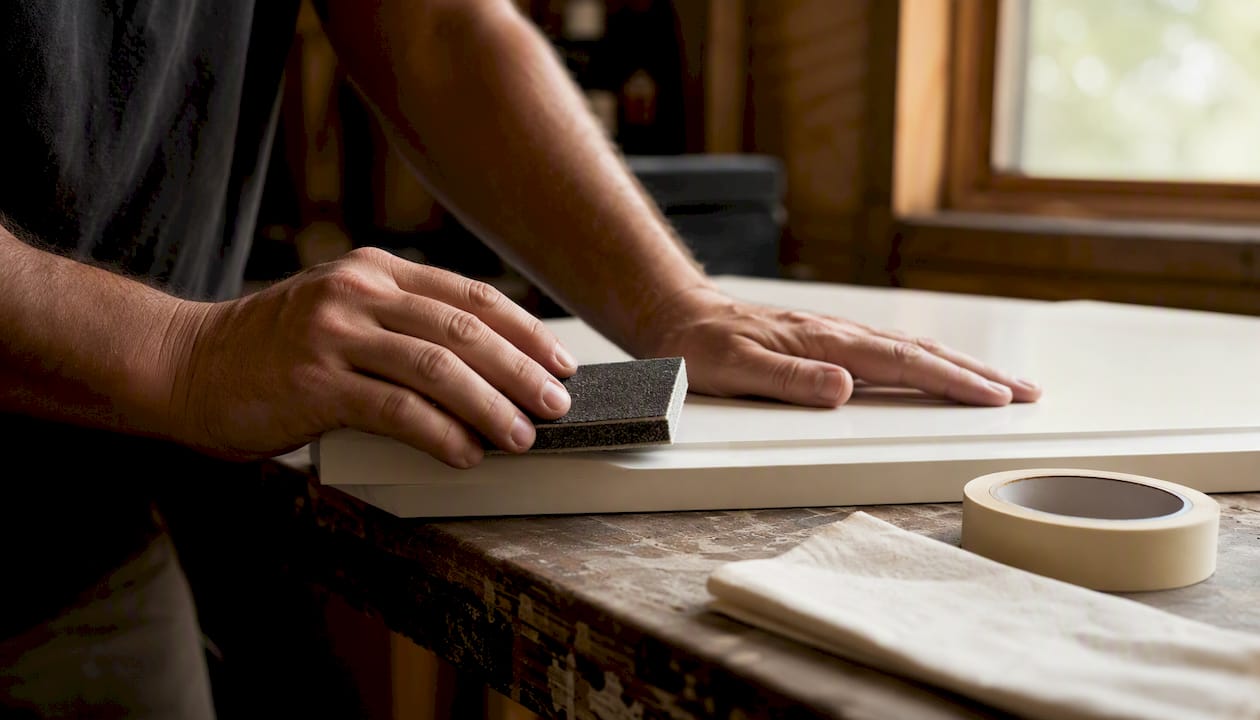
- Scuff-sand to 220-grit. You are not trying to remove the melamine face; you are creating a fine mechanical key for the primer to grip. Use a 220-grit sanding sponge and work in consistent, overlapping strokes. The surface should look uniformly dull when you are done. If you prefer a chemical approach, a liquid deglosser can substitute for sanding on factory finishes, but it must be applied evenly and allowed to dry fully before priming.
- Wipe down with a tack cloth. After sanding, every surface needs a final wipe to remove dust. Any particle left behind will show through the topcoat.
- Mask and protect the work area. Cover worktops, walls, appliances and floors with masking film before you spray. Overspray travels further than you expect, especially with airless systems.
Pro Tip: For greasy kitchens — particularly those near a hob — do two cleaning passes with sugar soap before sanding. The first pass lifts the bulk of the grease; the second gets what the first missed. Skipping the second pass on a heavily used kitchen is one of the most common reasons paint peels at the edges within a few months.
Why primer matters for melamine and which products to use
Melamine resin is a thermoset plastic with a hard, non-porous, low-energy surface. Standard primers simply cannot form a reliable chemical bond with it. Worse, the factory finish often contains a release or wax agent that can migrate back to the surface after sanding, creating an invisible barrier between the substrate and any coating applied on top. A true bonding primer seals that migration and creates the mechanical and chemical key that everything else depends on.
Recommended bonding primers
- INSL-X Stix: the go-to recommendation from professional painters for melamine and other difficult substrates. It bonds to surfaces that most primers will not touch and sands cleanly between coats.
- Zinsser Bulls Eye 1-2-3: water-based, low odour, and available in most UK trade and DIY outlets. It is not as aggressive a bonding agent as Stix but performs reliably when the surface is properly prepared.
- Shellac-based primers (such as Zinsser BIN): excellent adhesion and stain blocking, but they dry very fast and require methylated spirits for cleanup. Best for spot-priming problem areas rather than whole kitchens.
- Oil-based bonding primers: harder and more durable than waterborne options but slower to dry and higher in VOCs. Worth considering for high-wear areas if ventilation allows.
Application rules for primer
- Apply in thin, even coats. A thick primer coat is slower to dry, more prone to sagging and harder to sand flat.
- Allow the primer to reach the manufacturer's stated recoat window before applying a second coat or the topcoat. Rushing this stage is one of the primary causes of finish failure.
- Temperature and humidity matter: most waterborne primers need at least 10°C and below 80% relative humidity to cure correctly. Spraying in a cold garage in winter will extend dry times significantly.
- Do not sand between the primer and topcoat unless the primer coat is visibly rough or has dust nibs. If you do sand, use 320-grit and wipe clean before topcoating.
Pro Tip: Before priming the whole kitchen, apply primer to a hidden edge — the inside of a door or the back of a drawer front — and allow it to cure for 24 hours. Then try to scratch it with a fingernail. If it lifts, your surface prep was insufficient. Better to find that out on one hidden edge than across thirty doors.
Which topcoat finishes hold up in a kitchen?
The topcoat you choose determines both the look and the longevity of the finish. Melamine cabinet spraying gives you real options here, but not all paints are equal under kitchen conditions.
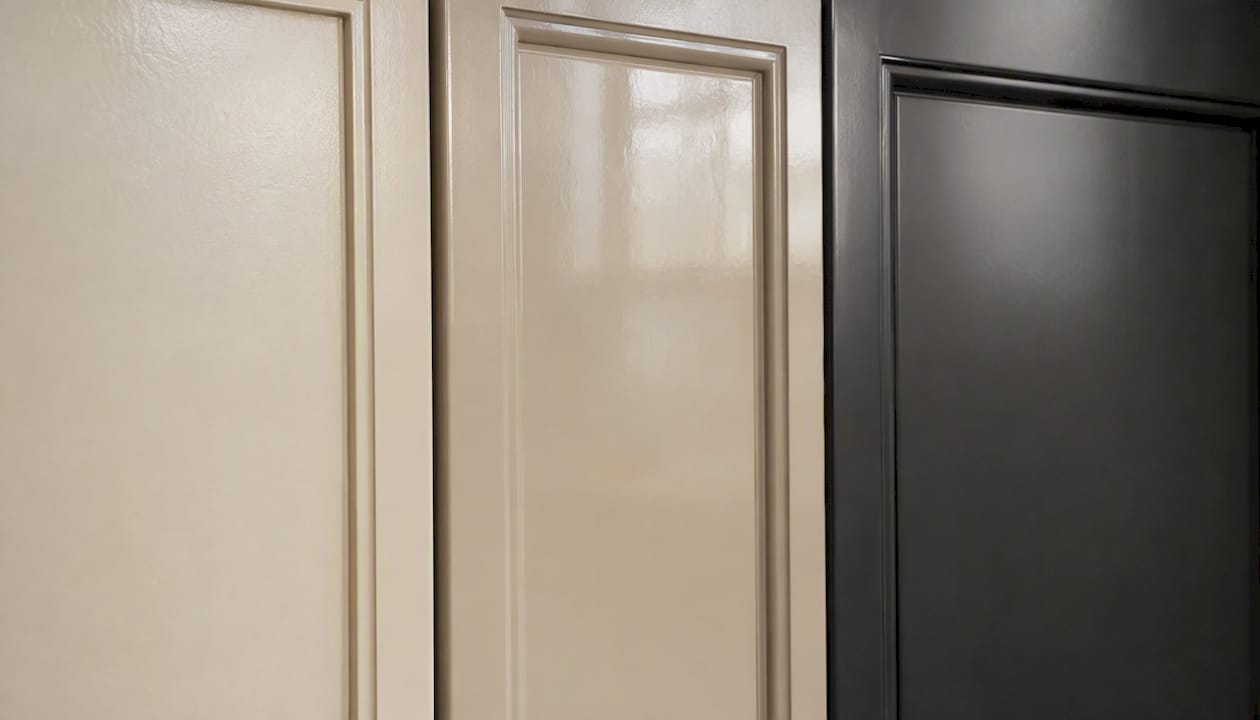
| Topcoat type | Hardness | Cure time | Ease of use | Odour | Best for |
|---|---|---|---|---|---|
| Waterborne alkyd / furniture enamel | High | 21–30 days full cure | Good | Low | Cabinet faces, most kitchens |
| Solvent-borne enamel | Very high | 7 days full cure | Moderate | High | High-wear areas, good ventilation |
| 2K (two-component) | Excellent | 5–7 days full cure | Difficult | High | Professional or semi-pro use |
| Standard waterborne emulsion | Low | 7 days | Easy | Very low | Not recommended for cabinets |
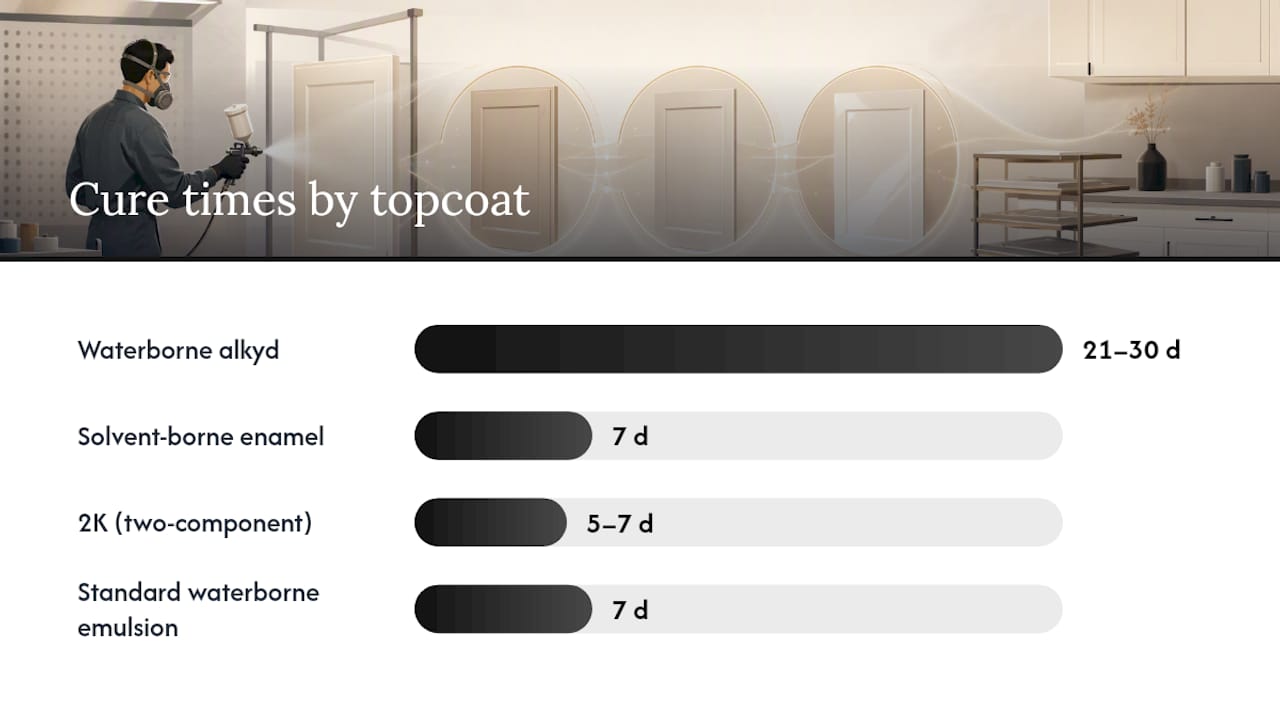
Waterborne alkyds — sometimes sold as "cabinet paint" or "furniture paint" — are the preferred choice among professional painters for cabinet faces. They combine the hardness of a solvent alkyd with water cleanup and a much lower smell, which matters when you are working inside a home.
Finish levels and where they suit kitchen use
- Matt: hides surface imperfections well but marks more easily and is harder to wipe clean. Better for low-traffic areas or inside cabinet boxes.
- Eggshell: the most practical choice for most kitchens. Wipes clean, has a subtle sheen, and is forgiving of minor surface prep imperfections. You can see finish comparisons across real kitchen projects to get a feel for how each looks in practice.
- Satin: slightly more reflective than eggshell, durable and easy to clean. A good middle ground for busy family kitchens.
- Gloss: the most demanding to apply without runs or orange peel, but the most durable and easiest to wipe down. Requires excellent surface prep and technique.
Pro Tip: Match the paint chemistry to the use case. Inside cabinet boxes and shelving see little wear, so a standard waterborne enamel is fine there. Cabinet door faces and drawer fronts take daily handling and cleaning, so use the hardest topcoat you can manage. For the first four weeks after painting, clean with a soft damp cloth only — no abrasive cleaners, no bleach-based sprays, and no scrubbing pads. The paint is still curing and is more vulnerable than it looks.
Step-by-step spraying technique for melamine cabinet doors
Good technique is what separates a smooth, factory-like result from a streaky, orange-peel mess. Before you touch a single cabinet door, spend twenty minutes on a test panel.
Setting up your sprayer
- Strain the paint through a fine mesh strainer into the sprayer cup. Never skip this — even new paint can contain dried flecks that block the nozzle mid-pass.
- Set your pressure and fan width. For HVLP systems, start at the lower end of the recommended pressure range and widen the fan to cover roughly 20–25 cm per pass. For turbine HVLP (Fuji Spray Q-Series), the turbine stage determines atomisation; adjust the air control knob until the spray pattern is even with no heavy centre.
- Test on a piece of card or MDF offcut. Spray a test pass and look for: even atomisation across the full fan width, no heavy wet centre, no dry edges. Adjust pressure and distance until the pattern looks uniform.
Spraying technique
- Hold the gun 25–30 cm from the surface for HVLP; slightly further (30–35 cm) for compact airless to reduce overspray impact.
- Move in steady, parallel passes at a consistent speed. Slowing down deposits more paint and causes runs; speeding up leaves dry, thin coverage.
- Overlap each pass by 50%. This sounds like a lot, but it is what produces even coverage without stripes.
- Trigger rhythm: pull the trigger just before the gun reaches the edge of the panel and release just after it passes the other edge. This prevents heavy build-up at the ends.
- Spray faces flat where possible — lay doors horizontally on a pair of sawhorses or a spray table. Vertical spraying increases the risk of runs on a freshly applied coat.
Pro Tip: Sequence your parts to avoid dust traps. Spray the face of a door first, allow it to become touch-dry, then flip and spray the back. Do edges last. This way, any overspray from the edges lands on an already-dry face rather than a wet one. Spray technique guides consistently recommend practising on a test panel to dial in settings before committing to the main job.
Troubleshooting spray defects
- Orange peel: usually caused by too much pressure, too little thinning, or holding the gun too far from the surface. Reduce pressure slightly and move the gun closer.
- Runs: the gun is moving too slowly or the coat is too thick. Sand flat with 320-grit when dry and re-spray a thinner coat.
- Uneven sheen: inconsistent gun speed or overlap. Practice the trigger rhythm on a test panel until the motion is automatic.
A realistic project timeline for painting melamine cabinets
A small kitchen of ten to twelve doors done properly takes more time than most guides admit. Budget time rather than just spray time — prep, priming and curing are where the hours go.
- Day 1 (prep): remove all doors and hardware, degrease with sugar soap (two passes for greasy kitchens), allow to dry, scuff-sand to 220-grit, wipe with tack cloths. Label everything. Estimated time: 4–6 hours for a small kitchen.
- Day 2 (prime): apply one coat of bonding primer to all pieces. Allow to reach the manufacturer's recoat window (typically 1–2 hours for waterborne primers at room temperature). Apply a second primer coat if the surface is very dark or the first coat looks patchy. Allow to dry overnight.
- Day 3 (first topcoat): apply the first thin topcoat. Allow to reach the recoat window (check the tin — typically 2–4 hours for waterborne alkyds at 18–20°C). Inspect for dust nibs and lightly sand with 320-grit if needed before the second coat.
- Day 4 (second topcoat and edges): apply the second topcoat. For gloss or satin finishes, a third coat is often worth the extra day for depth and uniformity.
- Cure period (days 5–28): touch-dry within hours, but full hardness takes 21–30 days for waterborne alkyds. Doors can be carefully rehung after 5–7 days, but treat them gently. Do not stack or lean doors against each other during this period — the paint will stick to itself.
Pro Tip: When rehanging doors, use a soft cloth between the door and the cabinet frame while adjusting hinges. The paint is still relatively soft at the one-week mark and will pick up marks from metal tools or rough handling. Give newly hung doors at least three weeks before cleaning them with anything other than a barely damp cloth.
Common mistakes and how to fix them
Most spray jobs that go wrong do so for the same handful of reasons. Knowing what to look for means you can catch problems early rather than discovering them after the kitchen is back together.
- Skipping the bonding primer: the single most common cause of peeling. Standard emulsion or even standard undercoat will not bond reliably to melamine. If you have already painted without a bonding primer and the finish is lifting, the only fix is to strip back to bare melamine and start again.
- Insufficient degreasing: paint that looks fine for the first few weeks then starts to peel at the edges almost always traces back to grease left on the surface. Two passes with sugar soap before sanding is the standard for kitchen cabinets.
- Sanding too aggressively: cutting through the melamine face with coarse sandpaper exposes the substrate beneath, which absorbs primer unevenly and shows as a patchy finish. Stick to 220-grit and use light, consistent pressure.
- Recoating too soon: applying a second coat before the first has reached its recoat window traps solvents underneath, which causes wrinkling or slow curing. Read the tin and respect the times.
- Edge band lifting: if the edge banding on a door starts to lift after painting, the adhesive has been compromised by moisture during cleaning or by heat. Re-glue with contact adhesive before priming; painting over a lifted edge will not hold it down.
Pro Tip: For small surface defects — minor orange peel or a dust nib — wet-sand with 1500-grit wet-and-dry paper and a drop of water, then buff with a cutting compound. This removes the defect without respraying the whole panel. For runs, allow the paint to cure hard (at least 48 hours), sand flat with 400-grit, then re-spray the affected area. A patch repair is acceptable on a back panel or inside face; on a prominent door front, a full rework usually looks better.
Safety, ventilation and disposal during a spray project
Spray painting indoors carries real health risks that are easy to underestimate. Fine paint mist stays airborne for longer than visible spray, and solvent vapours from enamel products can build to hazardous concentrations in an unventilated room.
- Respirator: wear a P3 half-mask respirator for waterborne products. For solvent-borne enamels or 2K systems, use a respirator with combined particulate and organic vapour cartridges (OV/P3). A paper dust mask is not adequate for spray work.
- Eye protection: safety glasses or goggles throughout spraying. Spray mist irritates eyes quickly and can carry solvents directly to mucous membranes.
- Gloves: nitrile gloves for all primer and paint handling. Solvent-borne products penetrate latex gloves.
- Ventilation: open windows and doors to create cross-ventilation. Position a box fan to draw air out of the room rather than across the wet surface. For enclosed spaces, a temporary spray tent with an extraction fan is the safest option.
- Keep bystanders away: children, pets and anyone not wearing PPE should leave the house or stay well away from the work area during spraying and for at least an hour afterwards.
- Disposal: leftover waterborne paint can be allowed to dry out in the tin (leave the lid off in a safe, ventilated spot) before disposal with general waste in most UK local authority areas. Solvent-borne paints and used solvent-soaked rags are hazardous waste and must go to a household waste recycling centre (HWRC). Check your local authority's guidance for the nearest HWRC that accepts paint and solvents — most UK councils list this on their websites.
- Compressed air and power tools: check hose connections before use, never point a spray gun at a person, and depressurise the system before changing nozzles or clearing blockages.
When should you hire a professional instead of DIY?
The honest answer is that spraying melamine cabinets is not a beginner project. It rewards people who have used a spray gun before, have time to do the prep properly, and can tolerate a learning curve. Here are the questions worth asking before you commit.
- How many doors does your kitchen have? A small galley kitchen with eight doors is manageable for a first-time sprayer. A large open-plan kitchen with twenty-plus doors, tall larder units and a central island is a different proposition entirely.
- What finish are you expecting? A satin or eggshell finish is forgiving of minor imperfections. High-gloss is unforgiving and shows every dust particle, run and orange-peel texture.
- Do you need colour matching? Matching an existing worktop, appliance or tile colour to a RAL or BS reference requires professional colour mixing. DIY aerosols and standard trade colours will not get you there.
- How much downtime can you absorb? A professional team can respray a kitchen in one or two days with minimal disruption. A DIY project across multiple weekends means living without cabinet doors for potentially three to four weeks.
- What happens if it goes wrong? A professional respray comes with a warranty. A DIY job that peels means stripping back and starting again, at your own cost and time.
A reputable professional should provide an on-site survey, a detailed written quote, colour matching from RAL or BS references, a hand-spray application to factory standard, and a written warranty. Red flags include vague scope descriptions, no mention of a warranty, and any suggestion that the work will be subcontracted to a third party.
Pro Tip: Ask any contractor for a photographic portfolio of completed melamine or laminate projects specifically — not just painted wood or UPVC. Melamine is a harder substrate to finish well, and a portfolio of completed kitchen cabinet resprays tells you far more than a general painting portfolio. Also ask for the warranty in writing before work begins, not after.
When I would DIY and when I would call a specialist
There is a version of this project that a confident DIYer can absolutely pull off. One or two doors, a small utility room, a bathroom vanity — these are reasonable DIY candidates if you have used a spray gun before and you are prepared to spend a Saturday on prep alone. The finish will not be identical to a professional job, but it can be genuinely good.
The calculation changes fast as the kitchen gets bigger. A full kitchen respray involves dozens of surfaces, multiple angles, tight corners around integrated appliances, and a colour consistency that has to hold across every single door. The margin for error is small, and the cost of getting it wrong — stripping back, re-priming and respraying — often exceeds what a professional would have charged in the first place.
What most guides underplay is the equipment gap. A £60 entry-level HVLP sprayer from a DIY shed will not atomise cabinet enamel the way a Fuji Spray turbine system does. The difference shows in the finish, and there is no technique that fully compensates for underpowered equipment on a demanding substrate like melamine. Renting a quality system closes that gap considerably, but it adds cost and a learning curve on borrowed kit.
My honest rule of thumb: if the kitchen has more than ten doors, if the finish expectation is satin or above, or if there is any colour matching involved, the professional route is the better investment. The five-year warranty that a specialist like Refinishingstudio provides is not just a sales point — it is the difference between a finish you can rely on and one you are quietly hoping holds together.
A guaranteed professional finish from Refinishingstudio
If the scope of your kitchen is beyond a comfortable DIY project, Refinishingstudio offers a professional kitchen cabinet spraying service across South Wales that removes every variable the DIY route leaves open.

Every job uses a hand-spray technique applied to factory standard, with a full choice of RAL, BS and custom colours across matt, eggshell, satin and gloss finishes. There are no subcontractors — the same team that surveys your kitchen carries out the work. Every completed project is backed by a five-year transferable warranty, which covers adhesion and finish quality. You can view completed melamine and laminate kitchen projects in the Refinishingstudio portfolio before committing to anything. To get started, request a no-obligation on-site survey and written quote directly through the kitchen respraying service page.
Sources
The following sources were used to compile this guide and are worth bookmarking for product datasheets, technique references and safety information.
- How to paint laminate cabinets the right way — Martha Stewart
- Painting melamine cabinets: complete guide for homeowners — D and G Flooring
- How to paint melamine — CompositePaint
- How to freshen up melamine and laminate surfaces — The Spruce
For sprayer user manuals and rental options, check the Wagner and Fuji Spray manufacturer websites directly, or contact your nearest tool hire centre for weekend HVLP rental availability.