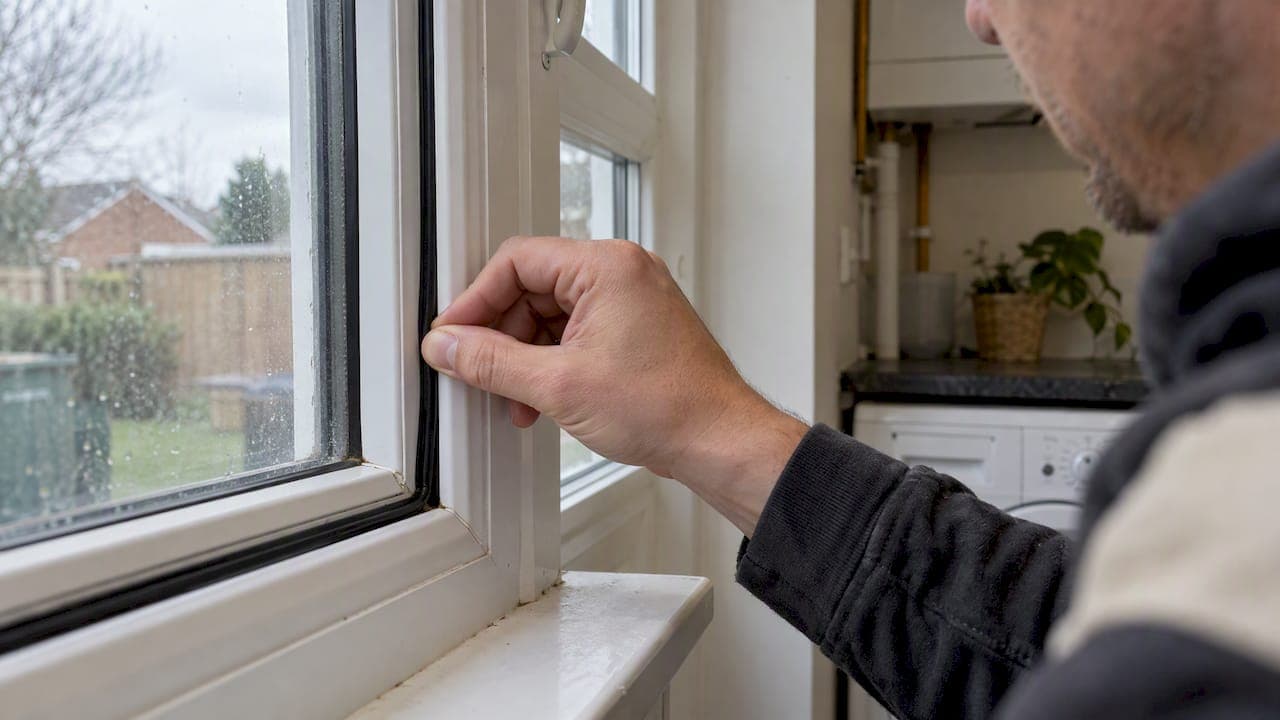
Do not spray paint over rubber or TPE seals on uPVC windows and doors: mask them or take them out before you start. Painting directly onto a seal causes two problems: the seal fails mechanically and, if a professional 2K coating is involved, there's a real health risk from the spray mist. Mask carefully, test adhesion on a hidden area first, or call in a professional for any job that needs a two-pack finish.
TL;DR:
- Mask seals thoroughly or remove damaged seals before spraying to prevent cracking, sticking, or mechanical failure caused by paint rigidity.
- Use a small, inconspicuous adhesion test patch to verify coating compatibility, wait for full cure, and ensure no wrinkling or lifting occurs before proceeding.
- Avoid DIY spraying of two-pack (2K) paints over rubber or TPE seals due to health risks, needing specialist containment, extraction, and air-fed breathing protection.
- Replacing worn seals is often more effective and less risky than masking or painting over them, especially if the gasket is already cracked or compressed.
- Larger or more durable finishes, such as foiled or colored profiles, require professional expertise, proper equipment, and a five-year warranty to ensure safety and quality.
Table of Contents
- Why spraying seals causes problems
- Safe alternatives to spraying seals
- Materials and compatibility: choosing coatings and testing adhesion
- Health and safety: HSE guidance and why some sprays belong to professionals
- Step-by-step: a cautious DIY approach for small touch-ups
- Refinishing Studio's professional approach to seals and safety
- What this means for your weekend project
- When to call in a professional and how to get a quote
- FAQ
- Sources
Why spraying seals causes problems
Window and door seals are made from flexible materials such as rubber, TPE, EPDM or brush pile, and they depend on being able to flex, compress and spring back every time you open and close the unit. Paint is rigid once it cures, so it fights that movement.
When overspray lands on a gasket, one of three things typically happens: the paint beads and never bonds properly, it cracks as the seal flexes, or it sticks the seal to the frame so the sash cannot move freely. Industry guidance warns that silicone residue on seals makes paint bead and crack, and that painted gaskets often stop doors and windows closing correctly.
You'll usually notice the fallout before you notice the cause:
- Stiff or sticky operation when opening and closing the window or door
- Paint flakes or ridges where the seal meets the frame
- Gaps or a blown seal that lets in draughts and water
- Marks transferred onto the frame from a seal that's stuck and peeling
Painted seals that fail often need full replacement, and a botched respray can also void any warranty on the original installation, so the short cut tends to cost more than the careful approach.
Safe alternatives to spraying seals
Painting over a seal is rarely the only option, and in most cases it isn't the right one. Work through these alternatives before you reach for a spray can.
- Mask thoroughly. Use a low-tack masking tape that won't leave residue, run it tight along the seal's edge with a slight overlap onto the frame, and keep drainage holes and moving hinge faces clear so the unit still functions once you're done.
- Remove and replace damaged seals. If a gasket is already perished, cracked or compressed flat, masking won't save it. A seal supplier can match the profile, whether it's a wedge, E, flipper or bubble gasket, and fit a like-for-like replacement.
- Lubricate instead of painting. A sticky or squeaking seal is often a maintenance issue, not a cosmetic one. A silicone-based lubricant restores flexibility without the risks that come with coating the rubber.
- Use a paintable sealant only where it's labelled as such, and only after full cure. Some sealants are designed to take paint, but applying anything too early, before the coating around it has fully cured, risks wrinkling or lifting both materials.
Pro Tip: If you're unsure whether a seal is original rubber or a paintable composite, test a small offcut or an inconspicuous section first rather than guessing on the whole frame.
Materials and compatibility: choosing coatings and testing adhesion
Specialist uPVC coating systems are built in two stages: a primer formulated to key onto the slick plastic surface, followed by a topcoat rated for UV and weather exposure. Neither stage is designed to go anywhere near a rubber or TPE seal, which is why masking matters as much as the coating itself.
Before committing to a full frame, run a hidden-area test:
- Clean a small patch in an inconspicuous spot, such as the inside edge of a frame
- Apply a thin coat and leave it for the manufacturer's stated flash-off time
- Check for wrinkling, softening or lifting, any of which signals incompatibility
- Leave the test patch for the full cure time before judging the result
Don't close or lock the window or door until the coating has fully cured, since early contact between a half-cured surface and the frame or seal can undo the test entirely. Two-pack (2K) systems, which give the hardest, most durable finish, need specialist extraction and containment to apply safely, which puts them outside the realistic scope of a DIY job. A useful reference for the preparation steps involved is this guide on respraying uPVC, which covers the masking and testing stages in more detail.
Health and safety: HSE guidance and why some sprays belong to professionals
Two-pack (2K) paints contain isocyanates, and spraying them releases a mist that's invisible but can cause occupational asthma with repeated exposure. HSE guidance on isocyanate spraying requires this work to happen inside an extracted spray booth or room running under negative pressure, with anyone present wearing air-fed breathing apparatus rated to an assigned protection factor of at least 20. That requirement for air-fed breathing apparatus is itself the clearest signal that 2K spraying isn't a weekend DIY job, whatever the finish promises.

Separate HSE guidance on spraying 2K products sets out clearance times that must be measured and observed before anyone re-enters the space without protection, because the mist doesn't disperse the moment the spray gun stops. Since you can't see or smell the hazard reliably, judging it by eye isn't an option.
If you're hiring a contractor for 2K work, it's worth asking a few direct questions:
- Can they show you the booth or containment they'll use, and is it tested?
- What clearance time do they observe before the area is safe to re-enter?
- What respiratory protection do operators wear, and is it air-fed?
- Are booth and breathing apparatus checks and maintenance up to date?
For anything requiring a 2K finish, the safer route is to leave it to a competent professional rather than attempt it at home.
Step-by-step: a cautious DIY approach for small touch-ups
If you're tackling a small, cosmetic job, non-2K aerosol or waterborne uPVC sprays are the only sensible DIY option. Never use two-pack isocyanate systems outside a controlled professional setting.
- Scope the job. Limit DIY work to small, localised areas, such as a scuffed sill or a scratched handle plate, rather than a whole frame.
- Clean and degrease. Remove silicone, wax and grease residue completely, since any trace will show up as a flaw in the finish.
- Mask carefully. Protect seals, hardware and glass, and run a hidden adhesion test in an inconspicuous spot first, as specialist preparation guides recommend.
- Spray in thin, even coats. Keep the can at the distance the product label specifies, allow the stated flash-off time between coats, and remove masking tape at the tack stage so it doesn't pull the finish.
- Leave it alone to cure. Don't close, lock or handle the unit until the coating has fully cured.
Pro Tip: If the test patch shows any wrinkling, softening or poor adhesion, stop there. That's your sign to call a professional rather than push on with the full job.
Watch for warning signs as the coating cures, tackiness that won't go away, colour that doesn't match the test patch, or any lifting at the edges, and treat them as a reason to pause rather than carry on regardless.
Refinishing Studio's professional approach to seals and safety
We specialise in professional UPVC respraying using a hand-spray technique, applied by the same team that quotes and preps every job. We protect seals through precise masking or measured removal rather than spraying over them, use proper containment for the coatings we apply, and finish every job to a factory standard.
- Every project carries a warranty, backed by a track record of numerous completed projects
- No subcontractors: the same team surveys and sprays every job
- Seals and hardware are masked or removed, avoiding direct painting over them
What this means for your weekend project
The advice that circulates online tends to focus on which spray can to buy, and far less on what happens to the seal underneath it. That's the wrong emphasis. The material compatibility question, whether your gasket can tolerate paint at all, matters more than the brand of aerosol you choose, because no coating fixes a seal that's already failed.
The bigger issue I'd flag is confidence. Homeowners often treat a smooth test patch on a frame as proof the whole job will go well, but a seal under compression behaves nothing like a flat test surface. If your test patch wrinkles, softens or lifts even slightly, that's not a detail to work around, it's the project telling you to stop.
Prioritise masking and testing over speed. A slower job with a hidden adhesion test and proper cure times costs you an afternoon. A rushed one can cost you a replacement seal, a damaged frame, or a call to a professional anyway, just later and more expensive.
— Mitchell
When to call in a professional and how to get a quote
Large jobs, foiled or coloured uPVC profiles, and any finish that needs 2K-grade durability all sit outside sensible DIY territory, and that's before you factor in the health and safety requirements around spraying isocyanate paints. If your project ticks any of those boxes, a professional survey is worth the call.
We handle the full process: survey, masking or seal removal where needed, a hand-sprayed factory-standard finish, and a five-year warranty on every job, all delivered locally without subcontractors.
- Get a free survey and quote for UPVC window spraying
- Ask about UPVC door spraying if your doors need the same treatment
- Check budget expectations on our cost guidance page before you book

Get in touch and we'll talk through what your frames need before any spraying happens.
FAQ
Does spraying uPVC work?
Yes, when it's done with the right primer and topcoat system and the seals are masked or removed first. Problems arise not from the idea of respraying uPVC itself but from skipping preparation steps like cleaning, masking and adhesion testing.
Can you just replace the seals on uPVC windows?
Yes, replacement seals are widely available in standard and custom profiles, including wedge, E, flipper and bubble gaskets. Replacement is often more practical than masking when a seal is already damaged or compressed.
What not to use on uPVC?
Avoid spraying directly over rubber, TPE or brush seals, since paint beading, cracking and sticking are common results. Also avoid two-pack isocyanate paints in a home setting, as HSE guidance requires negative-pressure booths and air-fed breathing apparatus for safe use.
How much does uPVC spraying cost?
Costs vary by job: our UPVC window spraying ranges from £80 to £2200 depending on scope, while UPVC door spraying ranges from £250 to £650. A survey gives you an exact figure based on the size and condition of your frames.
Sources
- Isocyanate paint spraying: Safely managing spray booths and rooms (HSG276)
- 7 Mistakes You're Making with uPVC Spray Paint (and How to Fix Them) – AerosolsRus
- Custom window gaskets – Seals Direct