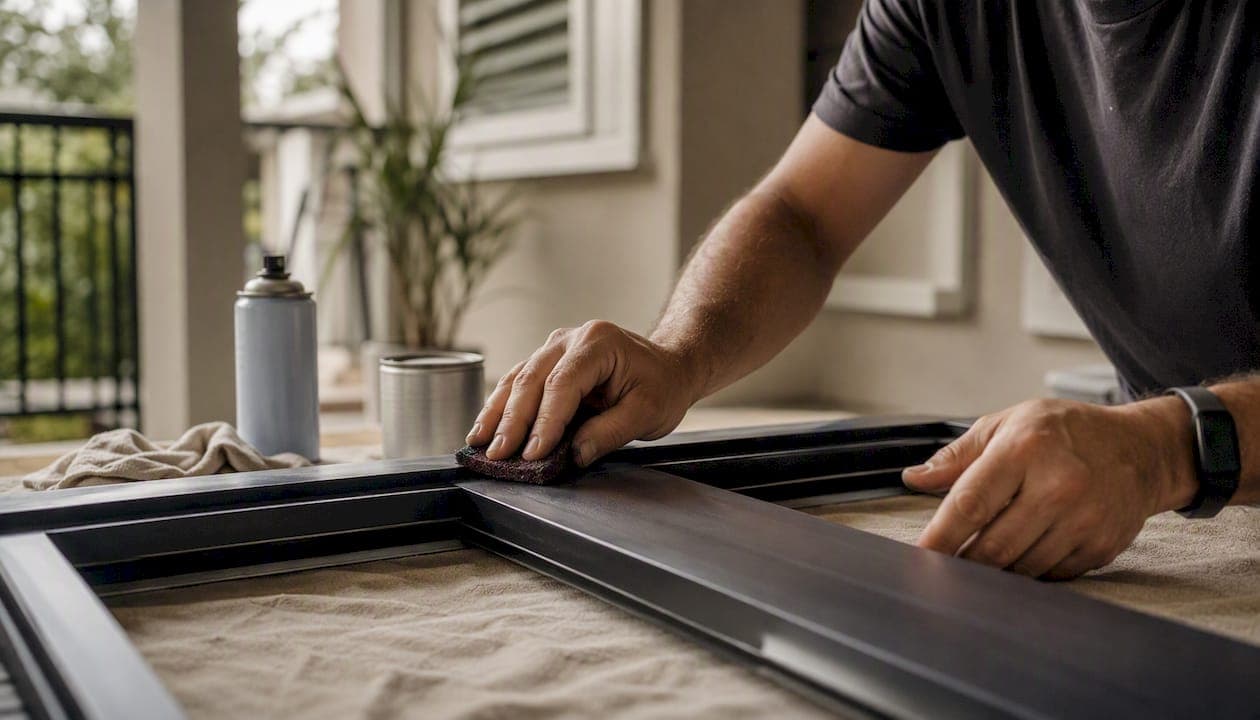
Yes, you can repaint powder-coated aluminium — provided you follow a strict preparation sequence. Skip a step and the new coating will peel within months. Get it right and a correctly applied respray can last several years on a well-maintained surface. Powder coating is a chemically bonded, non-porous finish whose glassy surface gives liquid paint almost nothing to grip, which is why preparation matters far more than the paint you choose.
The six-step sequence is:
- Clean the surface thoroughly with an alkaline degreaser and a wax-and-grease remover
- Remove corrosion and any loose or delaminating coating with nylon pads or careful power sanding
- Abrade the whole surface with P240–P320 grit paper or a Scotch-Brite pad to create a mechanical key
- Clean dust away with a tack cloth and a final solvent wipe, then prime immediately
- Prime with a high-adhesion primer suited to slick substrates (adhesion promoter, self-etching, or epoxy)
- Apply topcoat in thin, even coats using a sprayer where possible
Pro Tip: Before committing to the full job, apply your chosen primer and topcoat to a small, inconspicuous patch. Allow it to cure fully, then run a tape test. If the film lifts, you need a different primer or more aggressive abrasion — catching this early saves hours of rework.
Repainting is viable when the existing coat is structurally sound with only minor chalking, fading, or surface oxidation. It is not appropriate when you find active corrosion beneath the film, widespread delamination, or bubbling across large areas. Those conditions call for stripping to bare metal or professional intervention.
Key takeaways
Repainting powder-coated aluminium succeeds or fails at the preparation stage: abrasion, correct primer selection, and a test patch are the three steps that determine whether the finish lasts.
| Point | Details |
|---|---|
| Assess condition first | Repaint only over a stable, well-adhered coat; strip or seek professional help for delamination or active corrosion. |
| Abrasion is non-negotiable | P240–P320 grit or a Scotch-Brite pad across the whole surface creates the mechanical key that makes adhesion possible. |
| Run a test patch | Apply primer and topcoat to a small area, cure fully, and tape-test before committing to the full surface. |
| Match primer to the situation | Use an adhesion promoter for stable coats, self-etching primer over bare metal, and two-pack epoxy for high-exposure exterior work. |
| Refinishingstudio for South Wales | Professional hand-spray respray with a five-year transferable warranty, covering aluminium windows, doors, and conservatories. |
Table of Contents
- How do you assess the existing powder coat before starting?
- What tools and materials do you need for a UK repaint job?
- Step-by-step: how to repaint powder-coated aluminium correctly
- Which primers and topcoats work on powder-coated aluminium?
- When is sanding and repainting not enough?
- How do you achieve a factory-like finish when spraying?
- Curing times, adhesion testing, and how to maintain the finish
- Health, safety, and UK regulatory points to follow
- When is a professional hand-spray respray the better choice?
- What I've seen most often on repainting jobs
- Refinishingstudio: professional respray with a five-year warranty
- Sources
How do you assess the existing powder coat before starting?
The condition of the existing coating determines everything. A stable, well-adhered powder coat that has simply faded or chalked is an excellent candidate for repainting. A coat that is cracking, bubbling, or separating from the substrate will cause any new paint to fail in the same way, regardless of how good your primer is.
Signs of a stable, repaintable coat:
- Uniform surface with no cracks, bubbles, or lifting edges
- Chalking or fading visible but no bare metal exposed
- Minor scuffs or scratches without corrosion underneath
- Sound adhesion when you press a fingernail firmly at an edge
Signs that stripping or replacement is needed:
- Delamination: the coating lifts or peels away in sheets or flakes
- Bubbling beneath the film, which signals active corrosion underneath
- Visible rust or white aluminium oxide at joints, corners, or screw holes
- Cracks running through the film to the substrate
- Widespread loss of adhesion across more than roughly a quarter of the surface
Pay particular attention to joints, welds, and glazing rebates. Moisture collects there first, and hidden corrosion at these points is easy to miss on a quick visual check. Use a probe or a fingernail to test edges and corners. Check seals and gaskets too: if they are degraded, water will continue to undermine any new coating from behind.
| Condition | Recommended action |
|---|---|
| Stable coat, minor chalking or fading | Clean, abrade, prime, and repaint on site |
| Isolated damage, sound substrate | Spot-repair corrosion, feather edges, repaint |
| Active corrosion at joints or corners | Strip affected areas to bare metal before repainting |
| Widespread delamination or bubbling | Strip to bare metal or commission professional respray |
| Structural damage or failed seals | Repair or replace before any coating work |
What tools and materials do you need for a UK repaint job?
Getting the shopping list right before you start saves a wasted trip mid-job. Here is what you need, grouped by task.
Cleaning and surface preparation:
- Alkaline degreaser (e.g. a trade-grade panel wipe or pre-cleaner)
- Wax-and-grease remover / solvent wipe (isopropyl alcohol or a proprietary solvent cleaner)
- Scotch-Brite general-purpose pads (grey or maroon) for profiled sections
- P240–P320 wet-and-dry abrasive paper for flat areas
- Tack cloths to remove sanding dust before priming
- Compressed air or a clean brush to clear dust from rebates and profiles
Primers (UK-available options):
- Zinsser Bulls Eye 1-2-3 — a water-based adhesion primer widely used on slick and difficult substrates including powder-coated surfaces
- Zinsser B-I-N — shellac-based, useful where stain blocking is also needed alongside adhesion
- Self-etching primer (available from Rawlins Paints and similar UK trade suppliers) — chemically keys to bare metal exposed during preparation
- Two-pack epoxy primer — the highest-performance option for exterior aluminium, particularly where corrosion risk is elevated
Topcoats:
- Two-pack (2K) acrylic or polyurethane topcoat — the industry standard for exterior aluminium finish refurbishment; available through Vanda Coatings, Rawlins Paints, and specialist trade suppliers
- Single-pack alkyd or enamel — acceptable for interior or sheltered applications but not recommended for exposed exterior surfaces
- Aerosol touch-up paint — suitable only for very small repairs; not a substitute for a full respray
Application equipment:
- HVLP (high-volume, low-pressure) spray gun for detail work and smaller areas
- Airless sprayer for large flat surfaces such as curtain walling or garage doors
- Quality foam roller and synthetic brush for small, accessible areas where spraying is impractical
- Masking tape (fine-line tape for glazing edges), masking paper or plastic sheeting
PPE and safety consumables:
- P3 or FFP3 respirator for spraying and sanding
- Nitrile gloves
- Safety goggles or a full face shield
- Disposable overalls
Step-by-step: how to repaint powder-coated aluminium correctly
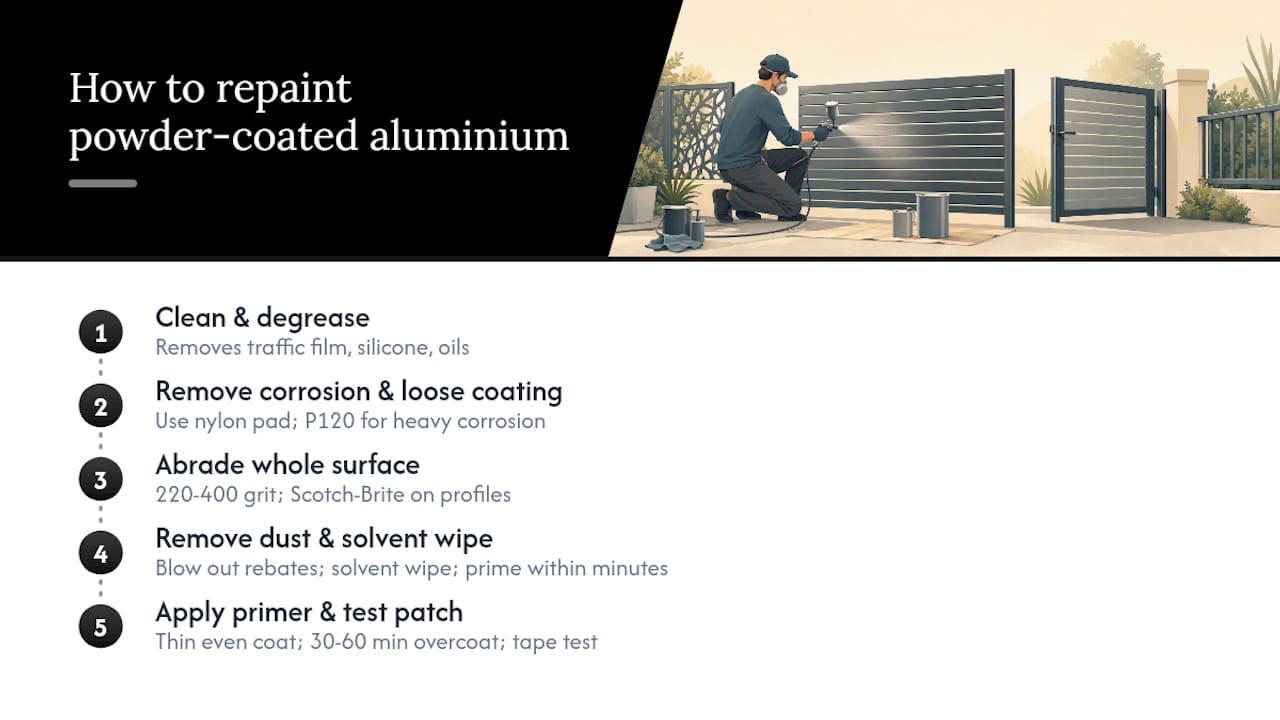
Follow this sequence without shortcuts. Each step exists because skipping it causes a specific, predictable failure.
Step 1: Thorough cleaning and degreasing
Wash the entire surface with warm water and a mild detergent to remove loose dirt, then apply an alkaline degreaser and work it in with a cloth or Scotch-Brite pad. Follow immediately with a wax-and-grease remover on a clean cloth, wiping in one direction only. Do not rub back and forth — you will redistribute contamination. Allow to dry completely. This step removes traffic film, silicone residues, and the oils that transfer from hands during handling. Any of these left on the surface will cause fisheye or adhesion failure in the primer.
Step 2: Remove corrosion and unstable coating
Work along joints, corners, and any areas showing bubbling or lifting with a nylon abrasive pad. Where corrosion is more established, use a detail sander with P120 paper to cut back to sound metal. Feather the edges of any areas where you have removed coating so there is no sharp step for the new film to bridge. Wipe away all residue before moving on.
Step 3: Mechanical abrasion of the whole surface
Lightly sand the entire surface with 220–400 grit paper to break the gloss and create a mechanical key. On flat sections, use a sanding block to keep pressure even. On profiled sections, rebates, and curved edges, use a Scotch-Brite pad, which conforms to the shape without cutting through to bare metal at high points. The goal is a uniform, dull surface with no shiny patches remaining. Shiny patches mean no key and no adhesion.
Step 4: Remove dust, solvent wipe, and prime immediately
Blow out all rebates and profiles with compressed air or a clean brush, then wipe the whole surface with a tack cloth. Follow with a final solvent wipe using a clean cloth and isopropyl alcohol. Prime within minutes of the final wipe. Aluminium oxidises quickly once bare metal is exposed, and that fresh oxide layer will compromise adhesion if you leave it to develop. This is one of the most commonly overlooked traps in aluminium coating restoration.
Step 5: Primer application
Apply the primer in a thin, even coat. A successful repaint depends on cleaning, abrasion, and priming with a product such as Zinsser Bulls Eye 1-2-3 to bond with slick substrates. Allow the minimum overcoat time stated on the product datasheet — typically 30–60 minutes for water-based adhesion primers at 20°C, longer in cold or humid conditions. Apply a second coat if the datasheet recommends it. Before proceeding to the topcoat on the full surface, run your test patch: apply primer and topcoat to a small area, allow full cure (usually 24–48 hours for a 2K system), then press a strip of 25mm masking tape firmly onto the cured film and pull it off sharply. Any paint lifting with the tape means the system needs revisiting.
Step 6: Topcoat application
On-site recoating works for structurally sound aluminium when you use a compatible 2K acrylic system for exterior durability. Apply the topcoat in two thin coats rather than one heavy coat. A heavy coat traps solvent, causes runs, and extends cure time unpredictably. Allow the inter-coat flash-off time specified on the datasheet. Spray at the recommended distance (typically 200–300mm for HVLP) using a cross-coat pattern: one pass horizontal, one pass vertical, to build an even film without striping.
Pro Tip: Spray between 10°C and 25°C with relative humidity below 80%. Cold slows cure and can cause blushing; high humidity causes solvent entrapment in 2K systems. Early morning in summer or mid-afternoon in spring often gives the best window in the UK.
Which primers and topcoats work on powder-coated aluminium?
Primer selection is where most DIY repaints go wrong. The three main categories each suit different situations.
Adhesion promoters (such as Zinsser Bulls Eye 1-2-3) are water-based, low-VOC, and designed to bond to slick, non-porous surfaces. They are the most accessible option for homeowners and work well over stable, well-abraded powder coats. They are not the strongest choice for exterior aluminium in exposed coastal or industrial environments.
Self-etching primers contain a mild acid (usually phosphoric acid) that chemically reacts with bare metal to create a bond. They are particularly useful where you have cut back to bare aluminium during corrosion removal. Available from Rawlins Paints and trade suppliers across the UK.
Two-pack epoxy primers are the professional-grade option. They cure by chemical cross-linking rather than solvent evaporation, producing a hard, moisture-resistant film that resists undercutting corrosion. They require mixing in the correct ratio and have a limited pot life once mixed, but they deliver the most durable foundation for exterior work.
| Primer type | Best use case | Limitations |
|---|---|---|
| Adhesion promoter (e.g. Zinsser Bulls Eye 1-2-3) | Stable powder coat, interior or sheltered exterior | Lower chemical resistance than epoxy |
| Self-etching primer | Areas with bare metal exposed | Not suitable over intact powder coat without abrasion |
| Two-pack epoxy primer | Exterior, coastal, or high-corrosion-risk surfaces | Requires mixing; limited pot life; higher cost |
For topcoats, two-pack acrylic topcoats are commonly specified for on-site recoating because they provide strong adhesion, UV and colour stability, and a durable hard film for architectural aluminium. Single-pack alkyds and enamels are adequate for interior or sheltered applications but will chalk and fade faster outdoors. Aerosols are acceptable for small touch-ups only — the film build is too thin and the adhesion too variable for a full surface.
Compatibility matters. Always check that your chosen primer and topcoat are from a compatible system, or confirmed compatible by the manufacturer. Mixing a water-based adhesion primer with a solvent-heavy 2K topcoat without checking compatibility can cause lifting or wrinkling. When in doubt, use a primer and topcoat from the same product family.
Pro Tip: Certain powder coatings contain slip agents that act as release agents and prevent adhesion even after abrasion. If your test patch fails despite thorough preparation, suspect a slip-agent-rich coating and switch to a more aggressive solvent wipe or a primer specifically formulated to overcome release-agent surfaces.
When is sanding and repainting not enough?
There are situations where painting over the existing coat is a false economy. Recognising them early saves the cost of a failed repaint on top of the cost of the strip and redo that follows.
Signs that complete removal is needed:
- Delamination across more than a small localised area
- Active corrosion running beneath the film at multiple points
- Evidence of slip agents defeating adhesion even after aggressive preparation (confirmed by a failed test patch)
- Previous coats that were applied without proper preparation and are now failing
Stripping methods:
- Media blasting (grit or bead blasting) removes the coating completely and leaves a clean, profiled surface ready for primer. It is the fastest and most thorough method for complex profiles. Requires specialist equipment and is usually done by a trade contractor.
- Chemical stripping uses a paint remover formulated for powder coatings. Effective on flat sections but slow on profiles and requires careful neutralisation before priming. Available from Rawlins Paints and similar UK trade suppliers.
- Oven burn-off is used by powder coating shops for small parts that can be removed and transported. The part is heated to around 400°C to char the coating, which is then blasted off. Not practical for on-site work.
The cost and effort difference between a DIY repaint and a professional strip-and-respray is significant. DIY materials for a typical set of windows or a garage door run to roughly £80–£200 depending on the products chosen and the area covered, plus your time. A professional respray from a specialist contractor typically costs more but delivers a factory-standard finish with a warranty, correct primer/topcoat systems, and the equipment to do the job in a single controlled session.
Pro Tip: If you are repainting more than one elevation of a property, or if colour matching across multiple units matters, a professional respray will almost always produce a more consistent result than a DIY job. The difference in gloss level and colour accuracy between a hand-sprayed 2K system and a brush-applied single-pack is visible from the street.
Research on aged and deteriorated aluminium substrates suggests that some surfaces respond better to solvent-soluble coating systems than to standard water-based approaches, reinforcing the case for specialist assessment when the substrate condition is uncertain.
How do you achieve a factory-like finish when spraying?
Technique accounts for as much of the final result as product choice. A good paint applied badly will look worse than a modest paint applied well.
Airless vs HVLP:
- HVLP guns atomise paint at lower pressure, producing a finer mist with less overspray. They are the better choice for detail work, window frames, and areas near glazing or masonry.
- Airless sprayers move more material faster and suit large flat surfaces such as garage doors or curtain walling panels. They require more masking to control overspray.
Spray technique:
- Hold the gun at a consistent distance (200–300mm for HVLP, further for airless) and keep it moving before you pull the trigger and after you release it — starting and stopping over the surface causes heavy spots.
- Use a cross-coat pattern: one horizontal pass, one vertical pass, overlapping each pass by 50%.
- Apply thin coats. Two thin coats always outperform one thick coat for both appearance and adhesion.
- Avoid spraying in direct sunlight on hot metal — the solvent flashes off too fast and the film skins before it can flow out.
Brush and roller for small areas:
- Use a quality synthetic brush or a short-nap foam roller. Long-nap rollers leave texture.
- Apply with light pressure and finish each section with a single long stroke in one direction to lay off the surface.
- Brush marks are most visible in raking light, so check your work at a low angle before the paint skins.
Feathering and blending touch-ups:
When repainting a localised area rather than the whole surface, feather the edges of the new coat into the surrounding finish by sanding back the overlap zone with P400 paper before applying the final coat. Gloss level is harder to match than colour, so always use the same product and the same application method as the original repaint when touching up later.
Curing times, adhesion testing, and how to maintain the finish
A 2K acrylic or polyurethane topcoat is typically touch-dry within one to two hours at 20°C but reaches full chemical cure over 5–7 days. Do not wash or stress the surface during that window. Temperature and humidity affect both timings significantly: at 10°C, expect cure times to roughly double; above 80% relative humidity, solvent entrapment can prevent a 2K system from curing properly at all.
Adhesion testing:
Run a tape test after the test patch has fully cured (24–48 hours minimum for a 2K system). Press a 25mm strip of masking tape firmly onto the cured film, rub it down with a fingernail, and pull it off sharply at 90°. No paint on the tape means good adhesion. Any paint lifting means the preparation was insufficient or the primer is incompatible with the substrate. Rework the area before proceeding.
Maintenance schedule:
Industry guidance from Qualicoat recommends cleaning coated aluminium at least once a year in normal environments and approximately every three months in coastal or industrial conditions. For a resprayed surface, the same frequencies apply.
| Environment | Cleaning frequency | Recommended method |
|---|---|---|
| Normal (inland, low pollution) | Once a year | Warm water, mild detergent, soft cloth |
| Urban or light industrial | Twice a year | Mild detergent, non-abrasive cloth |
| Coastal or heavy industrial | Every three months | Mild detergent, rinse thoroughly with fresh water |
| Poolside (chlorine exposure) | Every three months | Fresh water rinse after each use, annual detergent wash |
Avoid abrasive cleaners, wire brushes, and pressure washers at close range on a resprayed surface. These will cut through the film build faster than weathering will.
Health, safety, and UK regulatory points to follow
Spraying and sanding coatings involves real hazards. The Control of Substances Hazardous to Health Regulations 2002 (COSHH) require anyone using hazardous substances at work to assess the risk and put controls in place. For a homeowner doing a DIY job, the same principles apply as good practice even when the legal duty is less direct.
Key safety points:
- Read the Safety Data Sheet (SDS) for every product before use. SDS documents are available from suppliers including Rawlins Paints and Vanda Coatings.
- Store solvents and 2K components away from heat sources and in their original containers with lids secured.
- Never mix 2K hardener and base in a confined space without ventilation.
- Ventilate spray areas thoroughly: open windows and doors, use a fan to draw fumes away from your breathing zone, and never spray in an enclosed space without forced ventilation.
- Wear a P3/FFP3 respirator rated for organic vapours when spraying solvent-based products. A dust mask is not adequate.
- Wear nitrile gloves and safety goggles during sanding, solvent wiping, and spraying.
- Change gloves between the solvent wipe stage and the primer stage to avoid transferring contamination.
VOCs and low-VOC alternatives:
Two-pack solvent-based systems carry higher VOC content than water-based alternatives. Where the application allows, water-based 2K acrylics (available from specialist UK suppliers) offer lower VOC emissions without a significant sacrifice in durability for most residential applications.
Waste disposal:
Solvent-contaminated rags, empty paint tins, and mixed 2K waste are classified as hazardous waste in the UK. Do not dispose of them in household bins. Contact your local authority for details of hazardous waste collection points, or use a licensed waste carrier. Many local councils in England and Wales operate household hazardous waste drop-off facilities at civic amenity sites.
Pro Tip: Allow mixed 2K waste to cure fully in the open air before disposal — cured 2K material is significantly less hazardous than liquid waste and is easier to dispose of correctly.
When is a professional hand-spray respray the better choice?
Some jobs are simply beyond what a careful DIYer can achieve to a satisfactory standard, and recognising that early is cheaper than finding out after the fact.
Scenarios where a professional is the right call:
- Large surface areas (a full elevation of windows, a conservatory, or a garage door) where consistent colour and gloss across the whole job matters
- Access is needed above ground level, requiring scaffolding or a mobile elevated work platform
- Structural corrosion is present and needs proper treatment before any coating
- Colour matching is required across multiple units that were originally powder coated to a specific RAL or BS shade
- The property is being sold or let and a guaranteed, warranted finish is needed for peace of mind
What a reputable contractor delivers:
- Full condition assessment of the substrate before any coating work begins
- Correct mechanical keying using appropriate abrasives for the profile
- Primer and topcoat systems matched to the substrate and exposure conditions
- Hand-spray application of a 2K acrylic system producing a factory-standard finish
- A written warranty covering adhesion and finish quality
Questions to ask a contractor before you commission:
- Which primer and topcoat system will you use, and can I see the product datasheets?
- What warranty do you offer, and is it transferable if I sell the property?
- How do you handle areas of active corrosion found during preparation?
- What cure time should I allow before the surface is back in normal use?
For residential aluminium windows, doors, and conservatories in South Wales, Refinishingstudio's aluminium window spraying service covers all of these points, with a five-year transferable warranty and no subcontractors involved.
What I've seen most often on repainting jobs
The single biggest mistake property owners make is treating the preparation as optional. A premium 2K topcoat applied over a poorly abraded or contaminated surface will fail faster than a modest single-pack applied over a properly keyed one. The coating does not fail — the preparation does.
Realistically, a correctly applied respray over a stable powder coat, using a proper adhesion primer and a 2K topcoat, should last five to seven years in a normal UK environment before it needs attention. That is shorter than a factory powder coat applied to bare metal under controlled conditions, which can last fifteen to twenty years or more. The gap exists because on-site conditions — temperature variation, humidity, and the presence of an existing coating layer — are harder to control than a factory environment. Setting that expectation honestly matters, because a homeowner who expects a factory-equivalent lifespan from a site-applied repaint will be disappointed.
For readers who want a guaranteed result without the preparation risk, a professional respray with a written warranty is the more reliable route.
Refinishingstudio: professional respray with a five-year warranty
Repainting powder-coated aluminium yourself is achievable but the margin for error is narrow. If the preparation is not right, the finish will not last. For property owners in South Wales who want a factory-standard result without the risk of rework, Refinishingstudio offers a professional hand-spray respray service covering aluminium windows, doors, conservatories, fascias, and garage doors.

Every job uses a correct primer and 2K topcoat system matched to the substrate, applied by hand spray with no subcontractors. The finish comes with a five-year transferable warranty, which means it is an asset that stays with the property if you sell. Colours are available across the full RAL and BS range, in matt, eggshell, satin, or gloss. If you are weighing up painting versus replacing your doors or windows, a professional respray is almost always the more cost-effective route. Get a quote for your South Wales property and find out what a warranted finish costs compared to replacement.
Sources
The sources below were used to compile this guide and are worth consulting for product datasheets, technical standards, and further detail on specific points.
- How to paint over powder coatings | Zinsser UK
- Painting Over Powder-Coated Aluminium | Vanda Coatings
- Painting Over Powder Coating | Products Finishing
- Recommendations for the care of coated aluminium | Qualicoat
- How do you paint powder coated aluminum? | CYPaint
- Coating rehabilitation onto deteriorated anodic oxidation aluminum alloy building materials | J‑Stage